
SAMPLE AUCTION for Doctors Without Borders
A few weeks ago we marked the one-year anniversary of my mother-in-laws death. In both the grief of that loss and the celebration of her life, something that keeps coming up again and again is the love she had for making things. Cooking, growing, sewing. Now our home is filled with the evidence. There are plants in my garden grown from seeds she saved for me. "Grandmas best rice recipe" is the only one my kids will eat, and our beds and sofa are adorned with the most beautiful quilts. Not just ours - her best friend sent us a card mentioning the lovely handmade gifts she'd received over the years.
These tangible traces of her creativity, her knowledge, her personhood as a whole. Over the last year, adding the finishing touches to the child's quilt she’d been working on, I've frequently stopped to ponder their significance and how they surpass the initial act of making or giving. How blessed we are to have them to hold on to, to remember. For the past two months, also, I've dwelled on the scores of Gazan makers and givers that have been reduced to horrifying numbers.
Limbs, deaths, orphans. Displacement, disease, starvation. Where are their traces, the mothers who embroider (honoured in this beautiful piece I came across a few days ago)? What's happened to the statuettes painstakingly, lovingly carved out of olive wood? Who's there to savour the steaming pans of musakhan? And what on earth do you do when both maker and recipient are gone? To me, creating is as important as breathing, but it seems rather trite to say that when I'm able to focus on far more than just survival.
I feel it is only right, then, to do what I can in the best way I know how. On the 22nd of December - Winter Solstice and one of my absolute favourite celebrations of the year - I will be auctioning off a shawl and a cardigan sample.
75% of the auction proceeds, as well as all crochet pattern sales until 31 December, will be donated to Doctors Without Borders. I am keeping the remaining 25% to pay myself a small salary and to cover things like postage.
If you're interested, please do read all the details below carefully. And don’t forget, if you can't place a bid, you can still contribute by sharing this article and/or my social media posts.
Would you rather make your own crocheted garments and accessories? At the very end of this post I’ve added links to a selection of my favourite designs.
W H A T

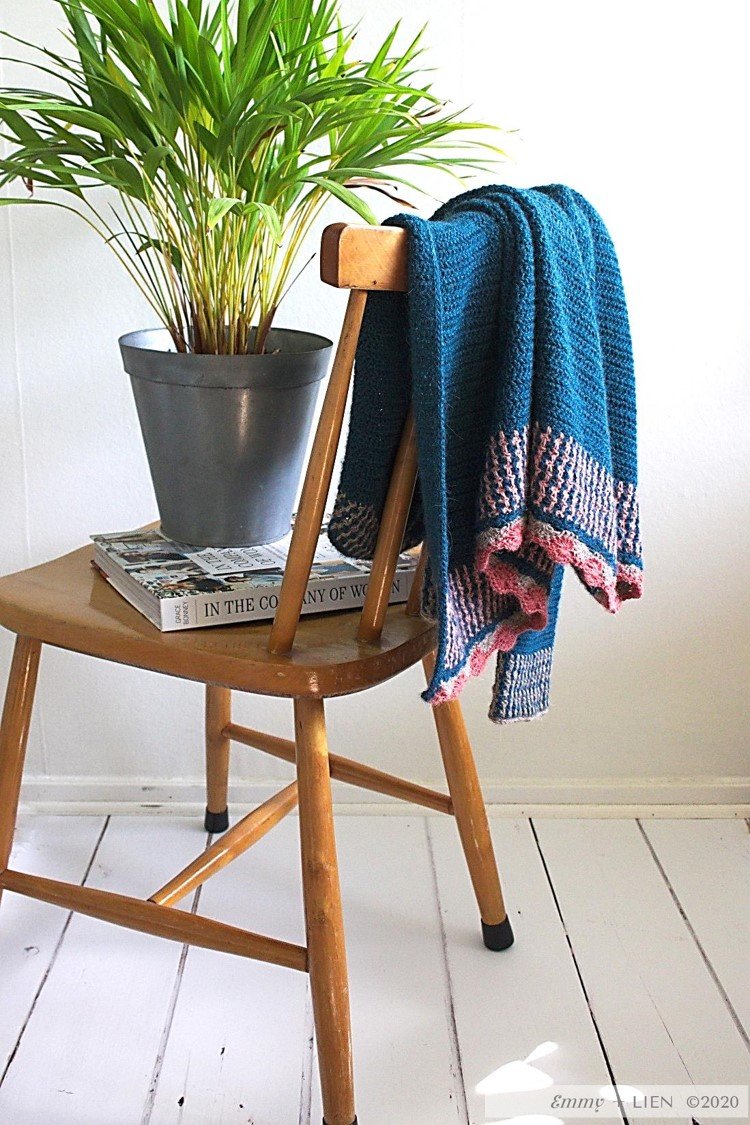
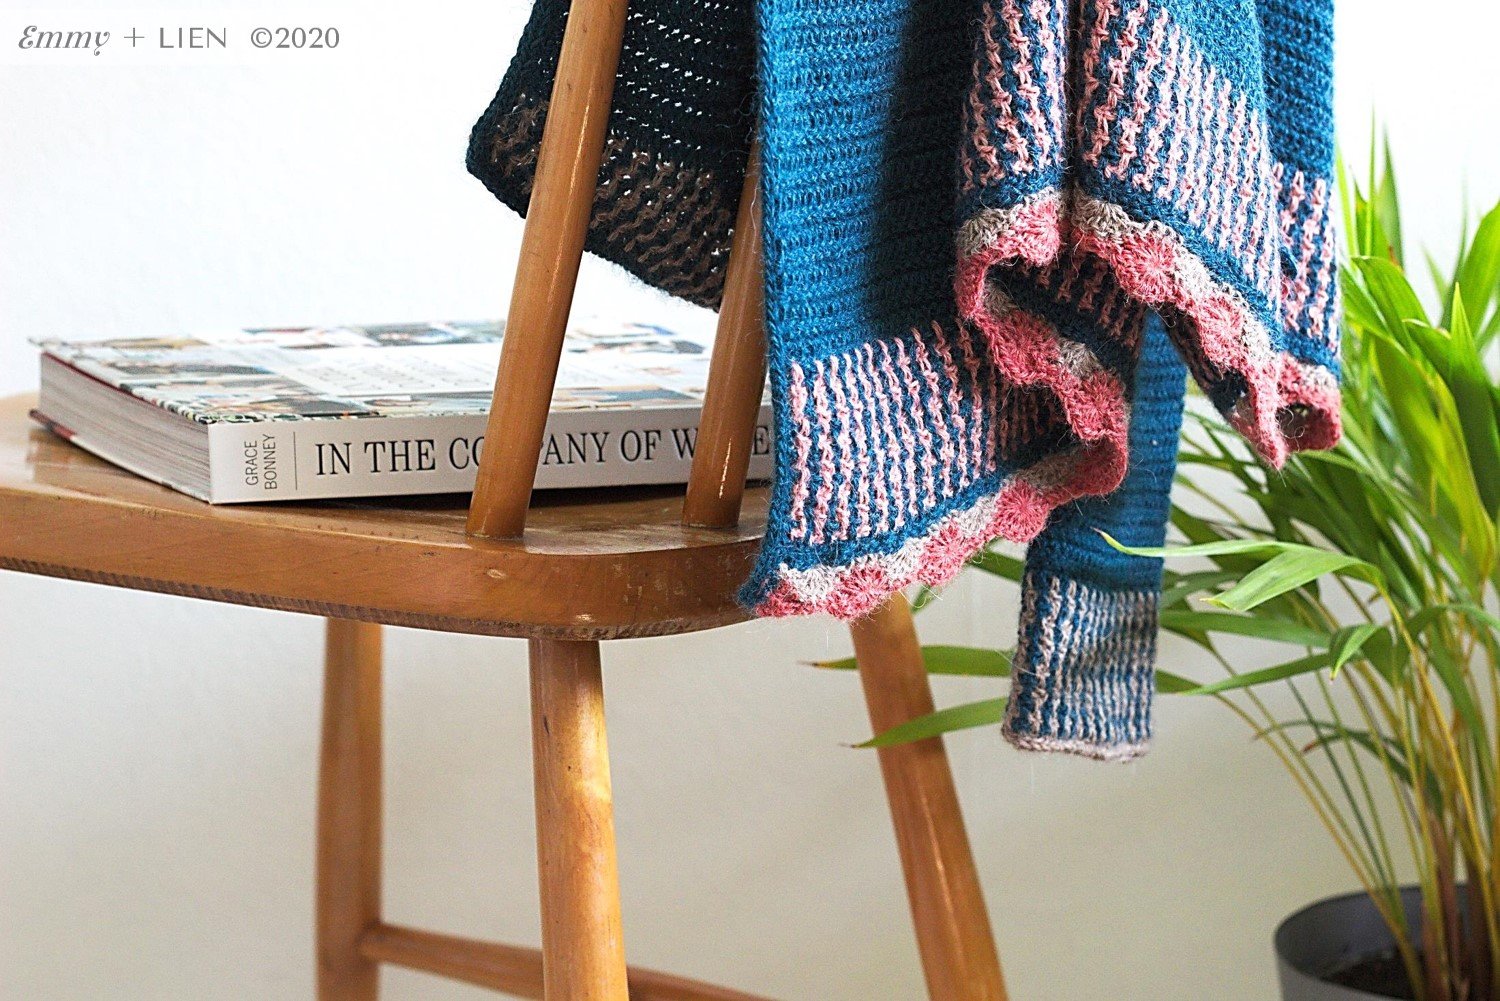
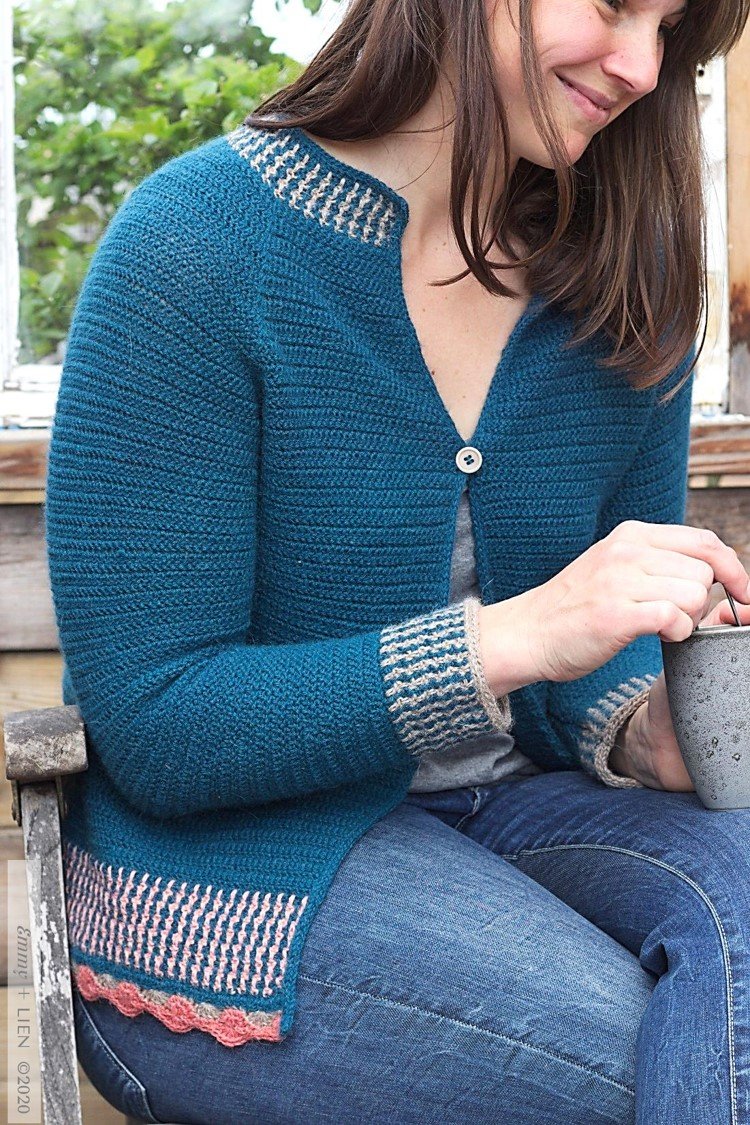
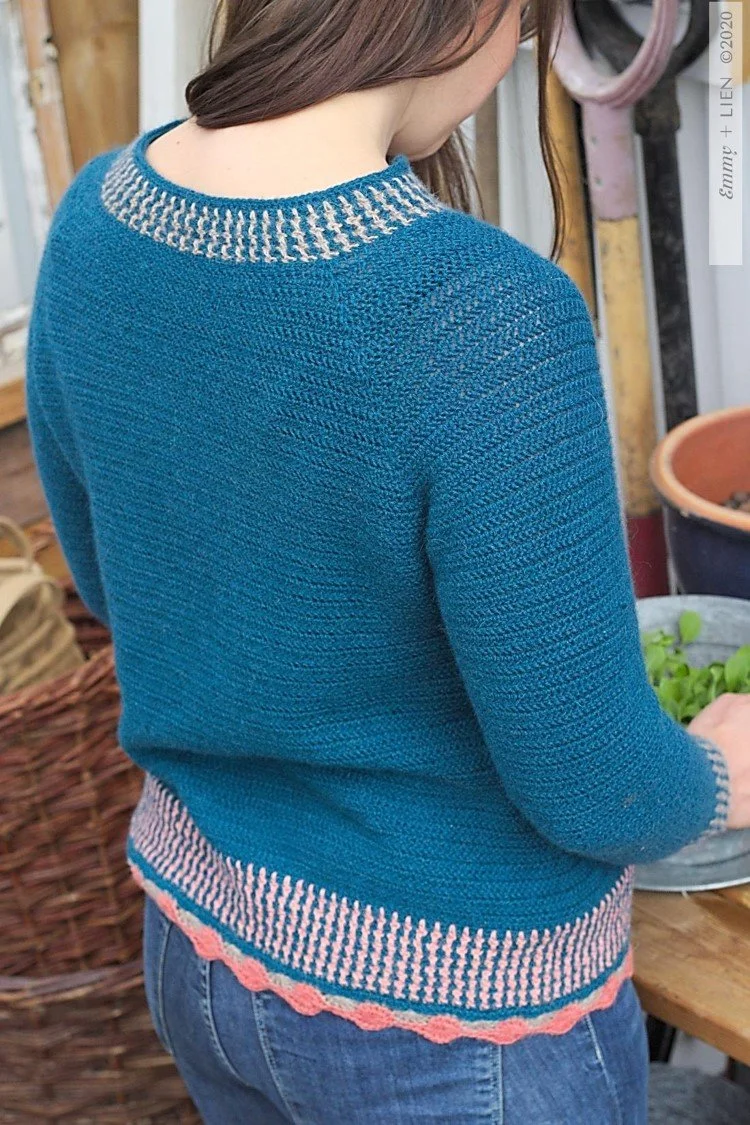
ITEM ONE - ilo. Cardigan
A swingy, A-line cardigan with a delightful contrast collar, hem and cuffs. Handcrocheted by Designer Eline Alcocer using pure, soft alpaca yarn.
Size - finished bust circumference 92cm / Length 58.5cm
Starting bid 75EUR


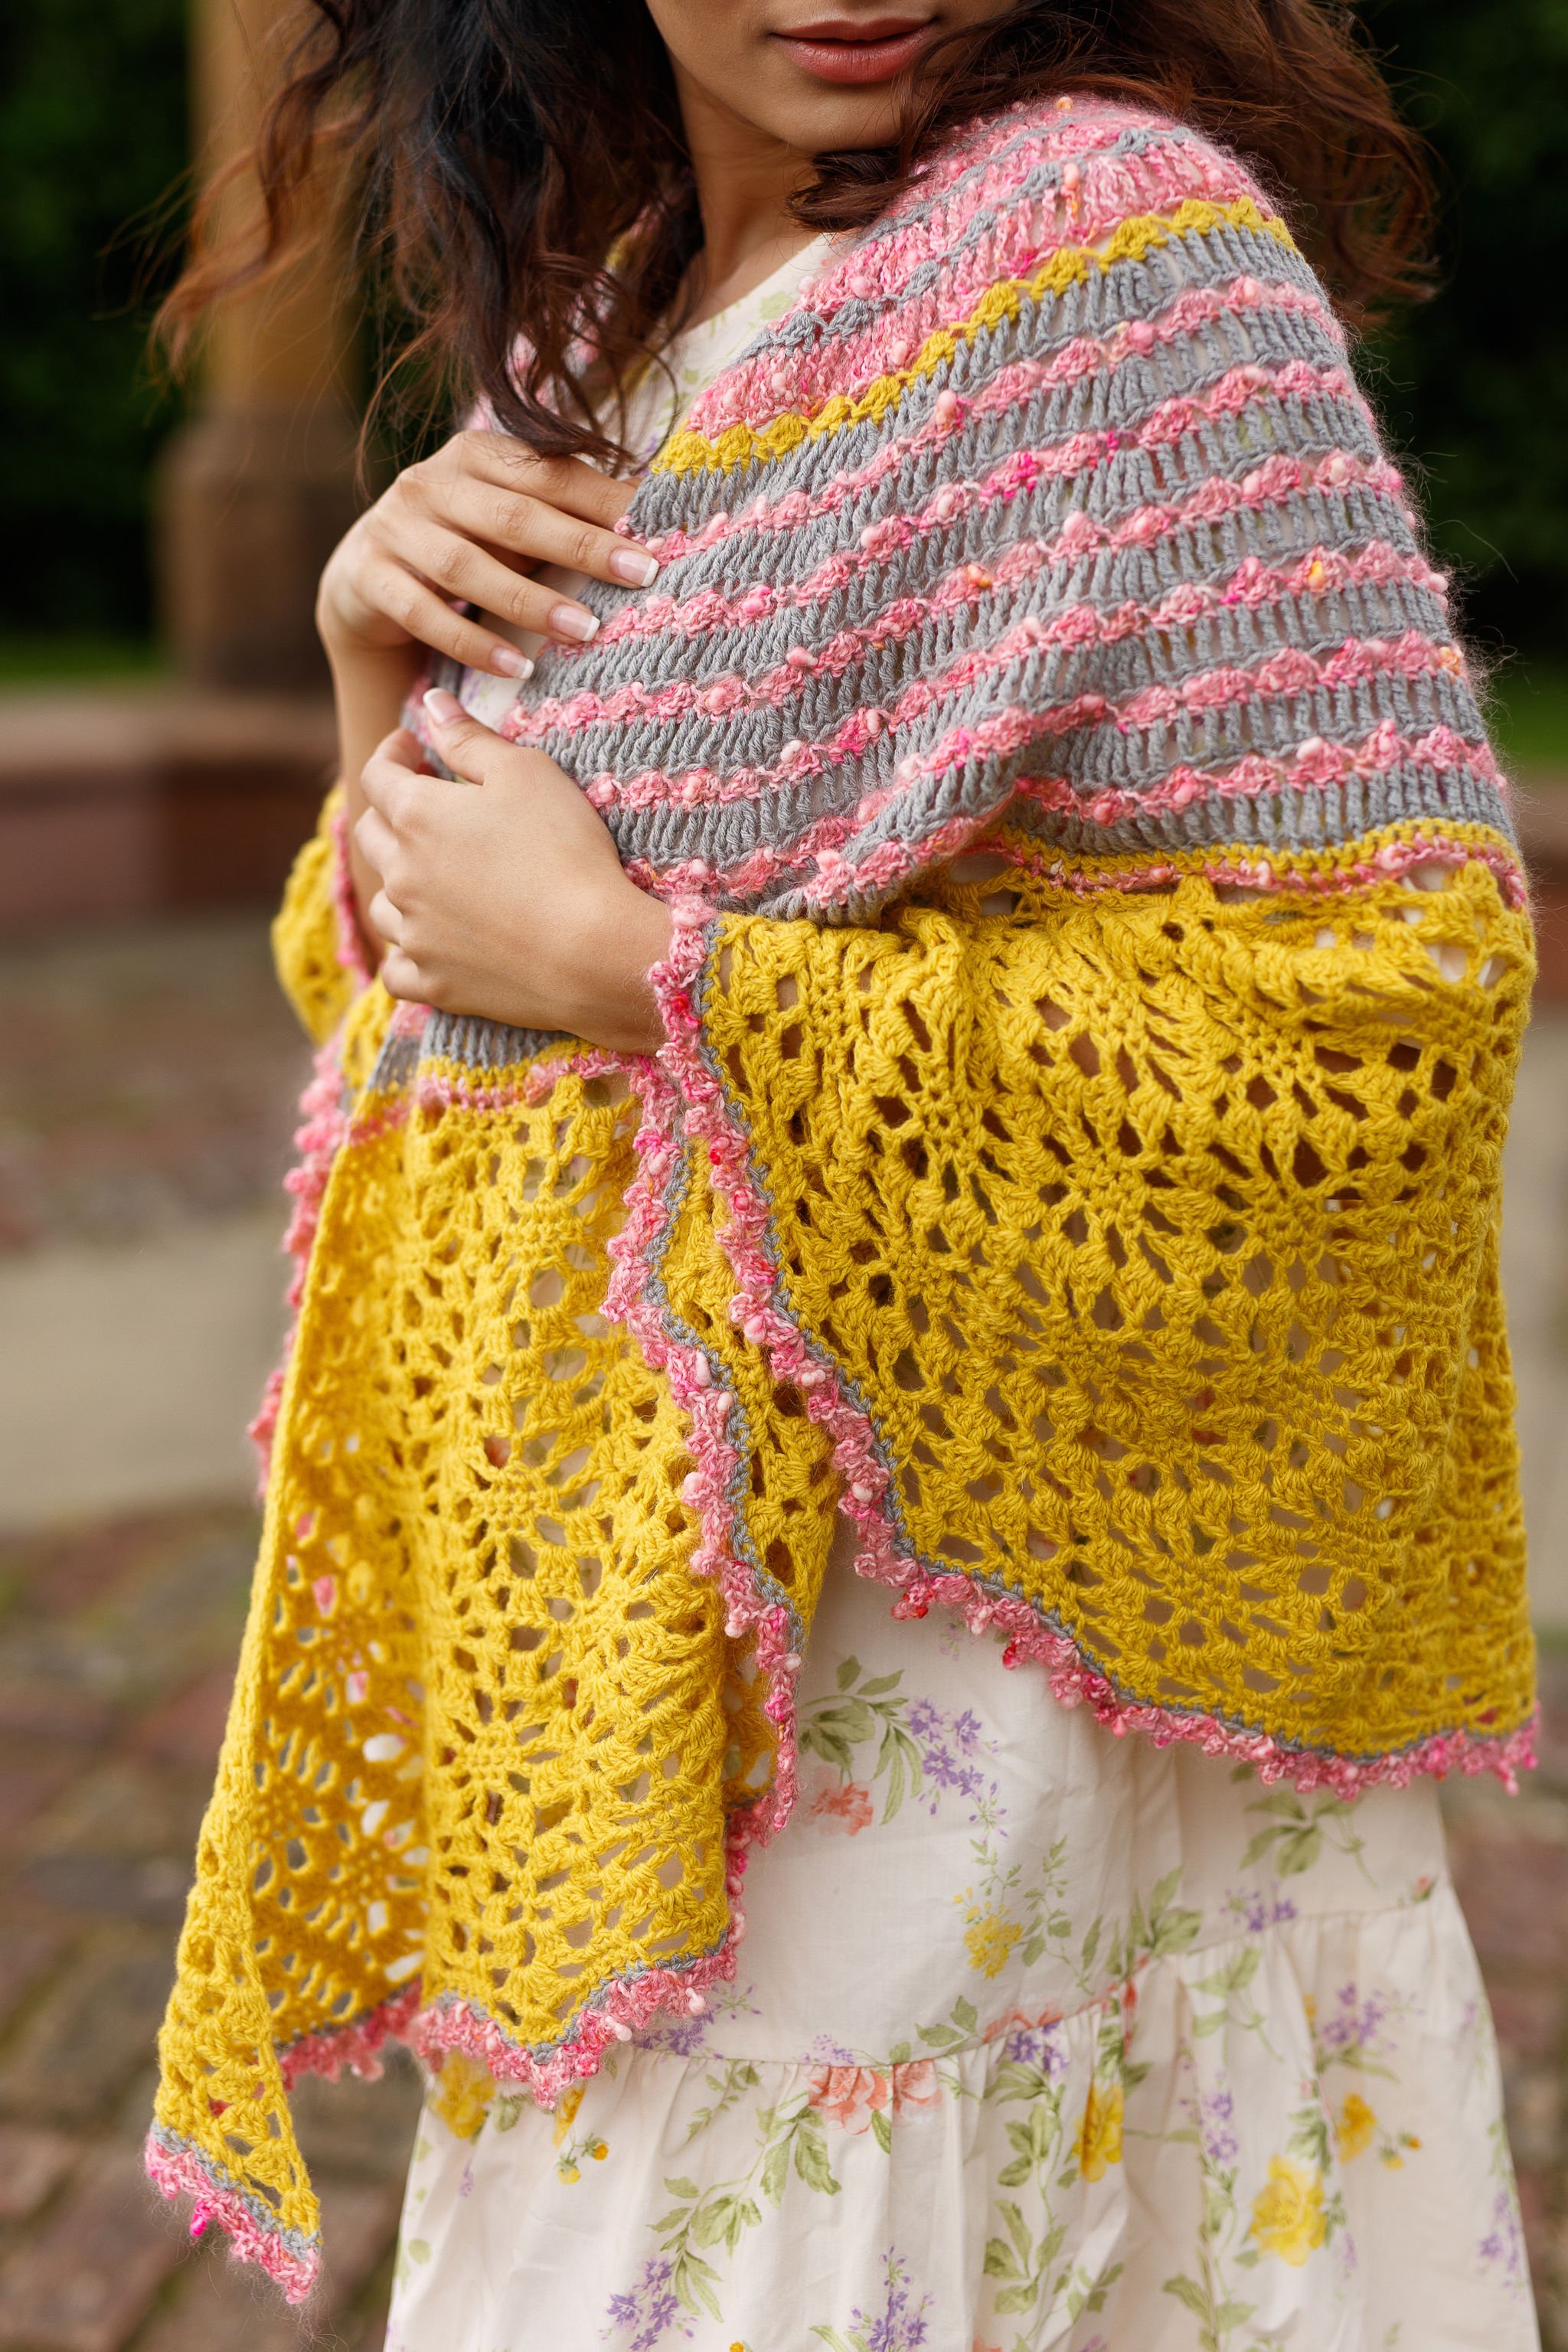
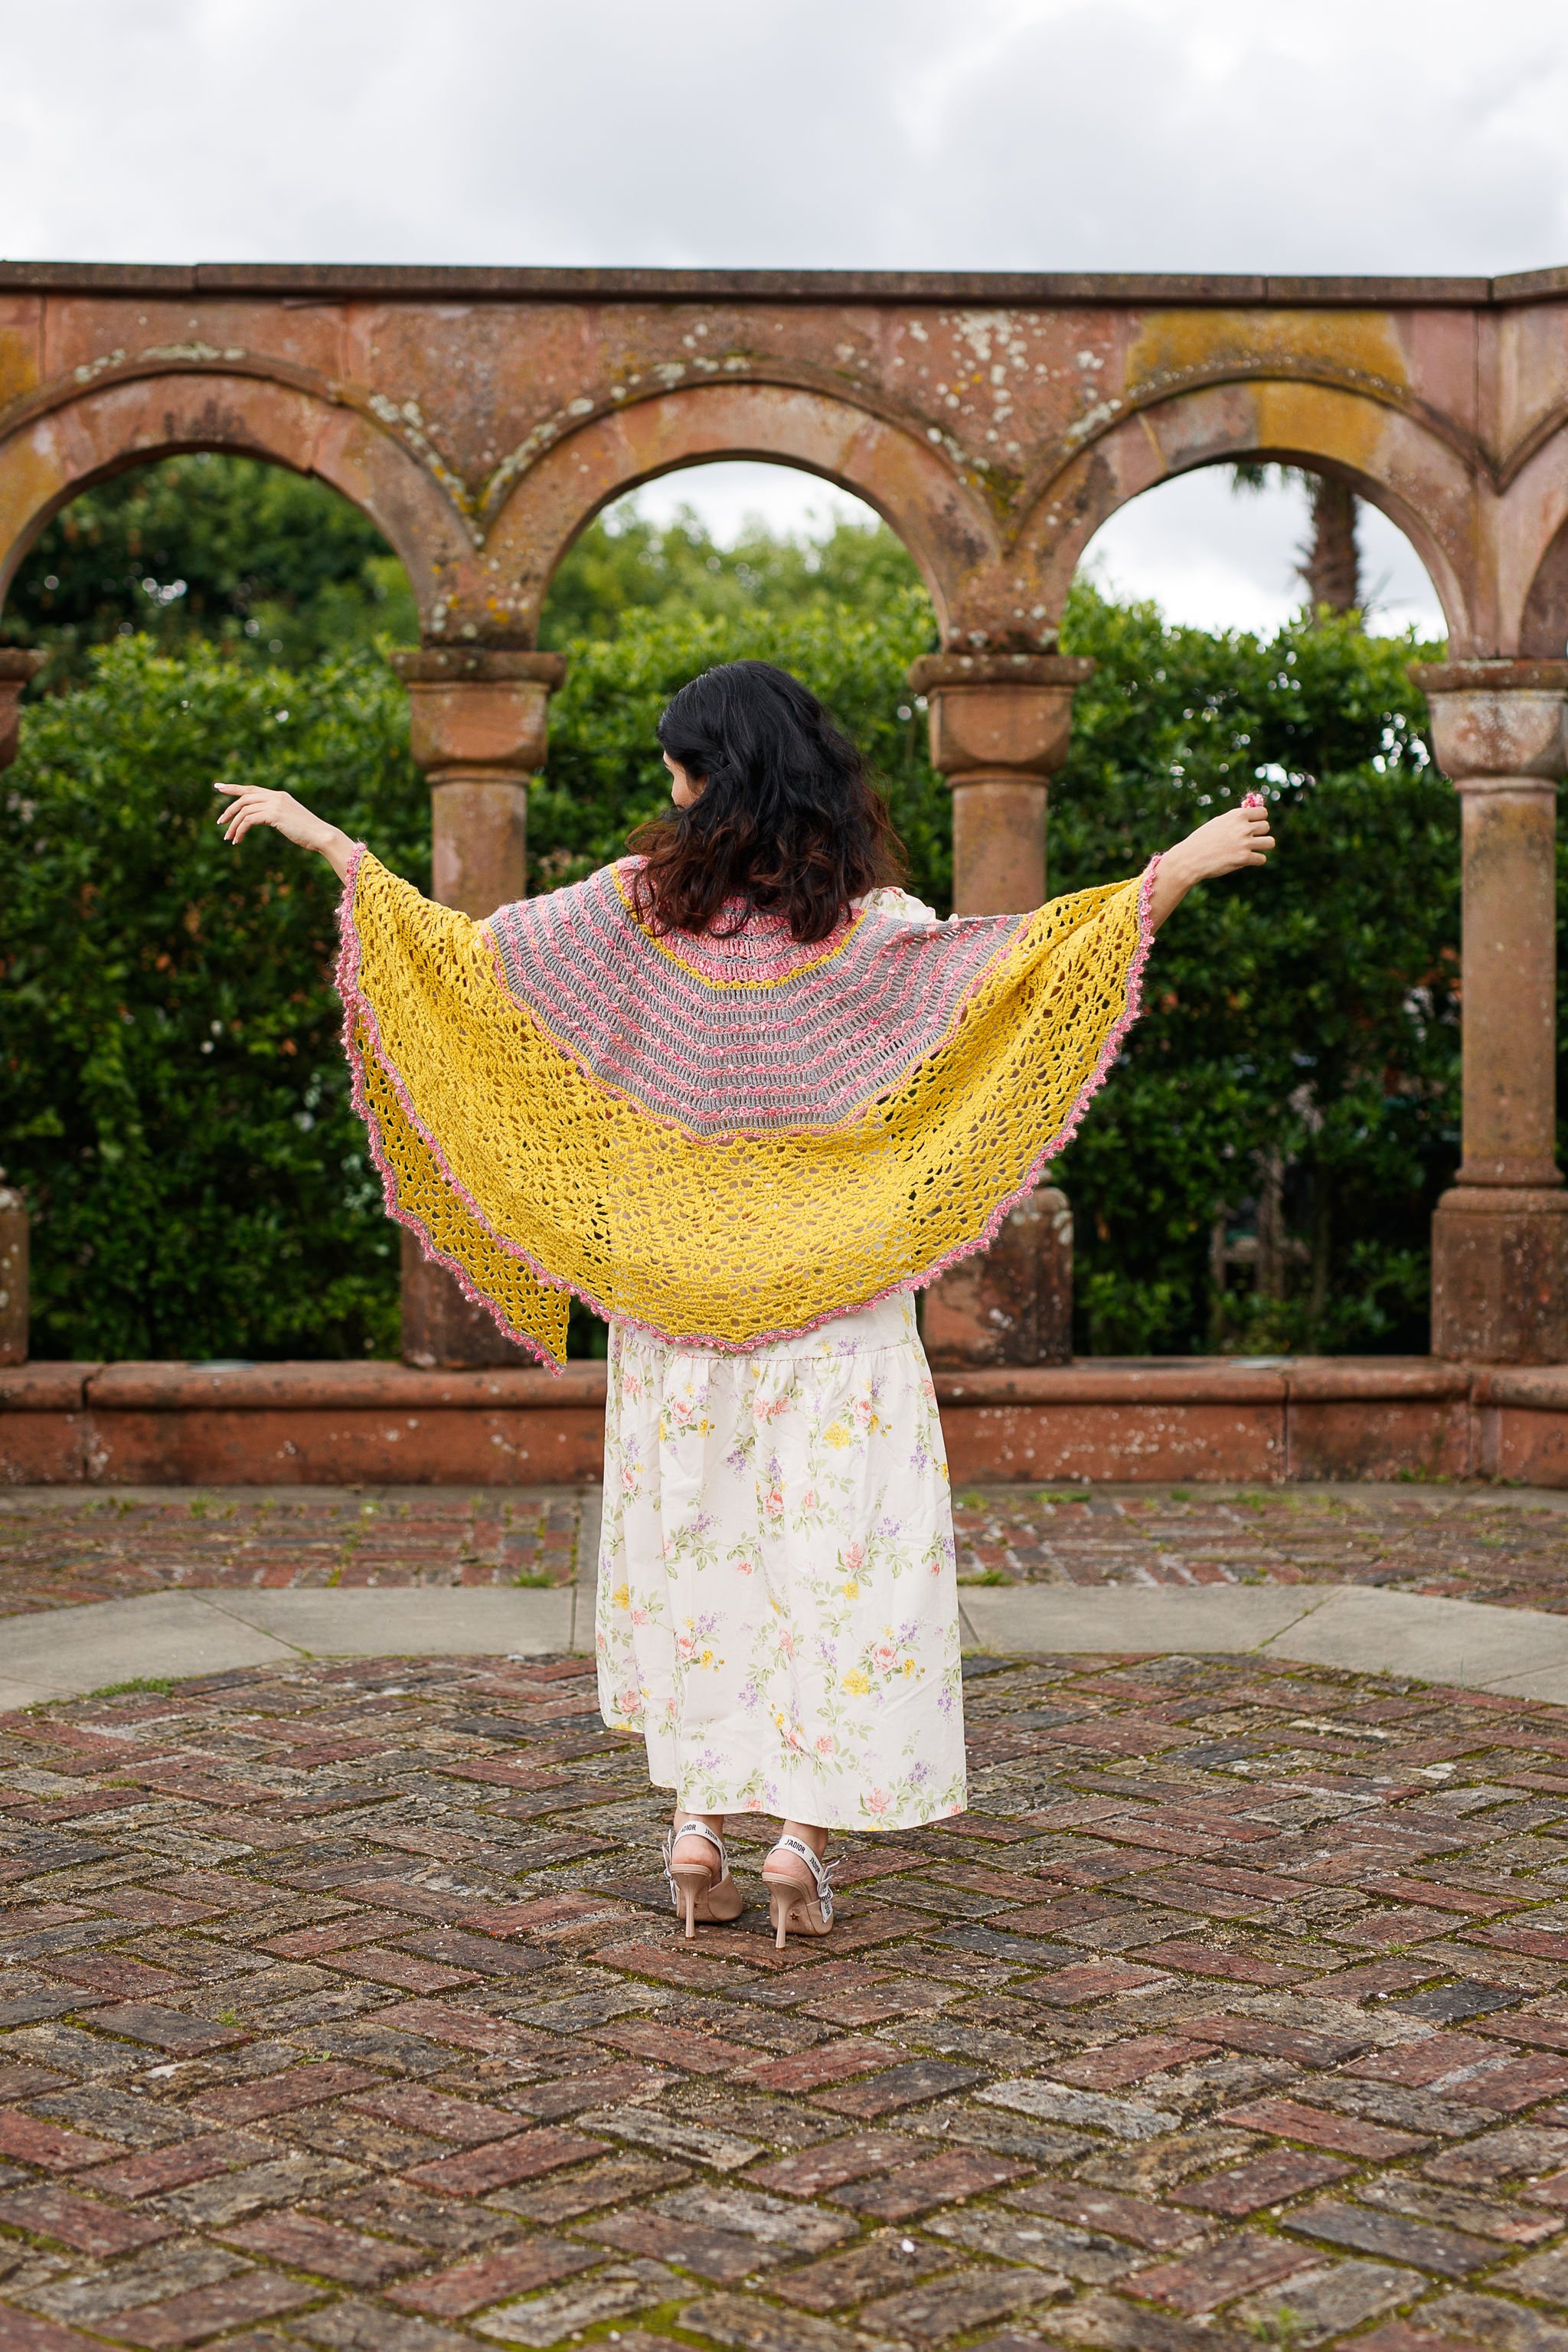
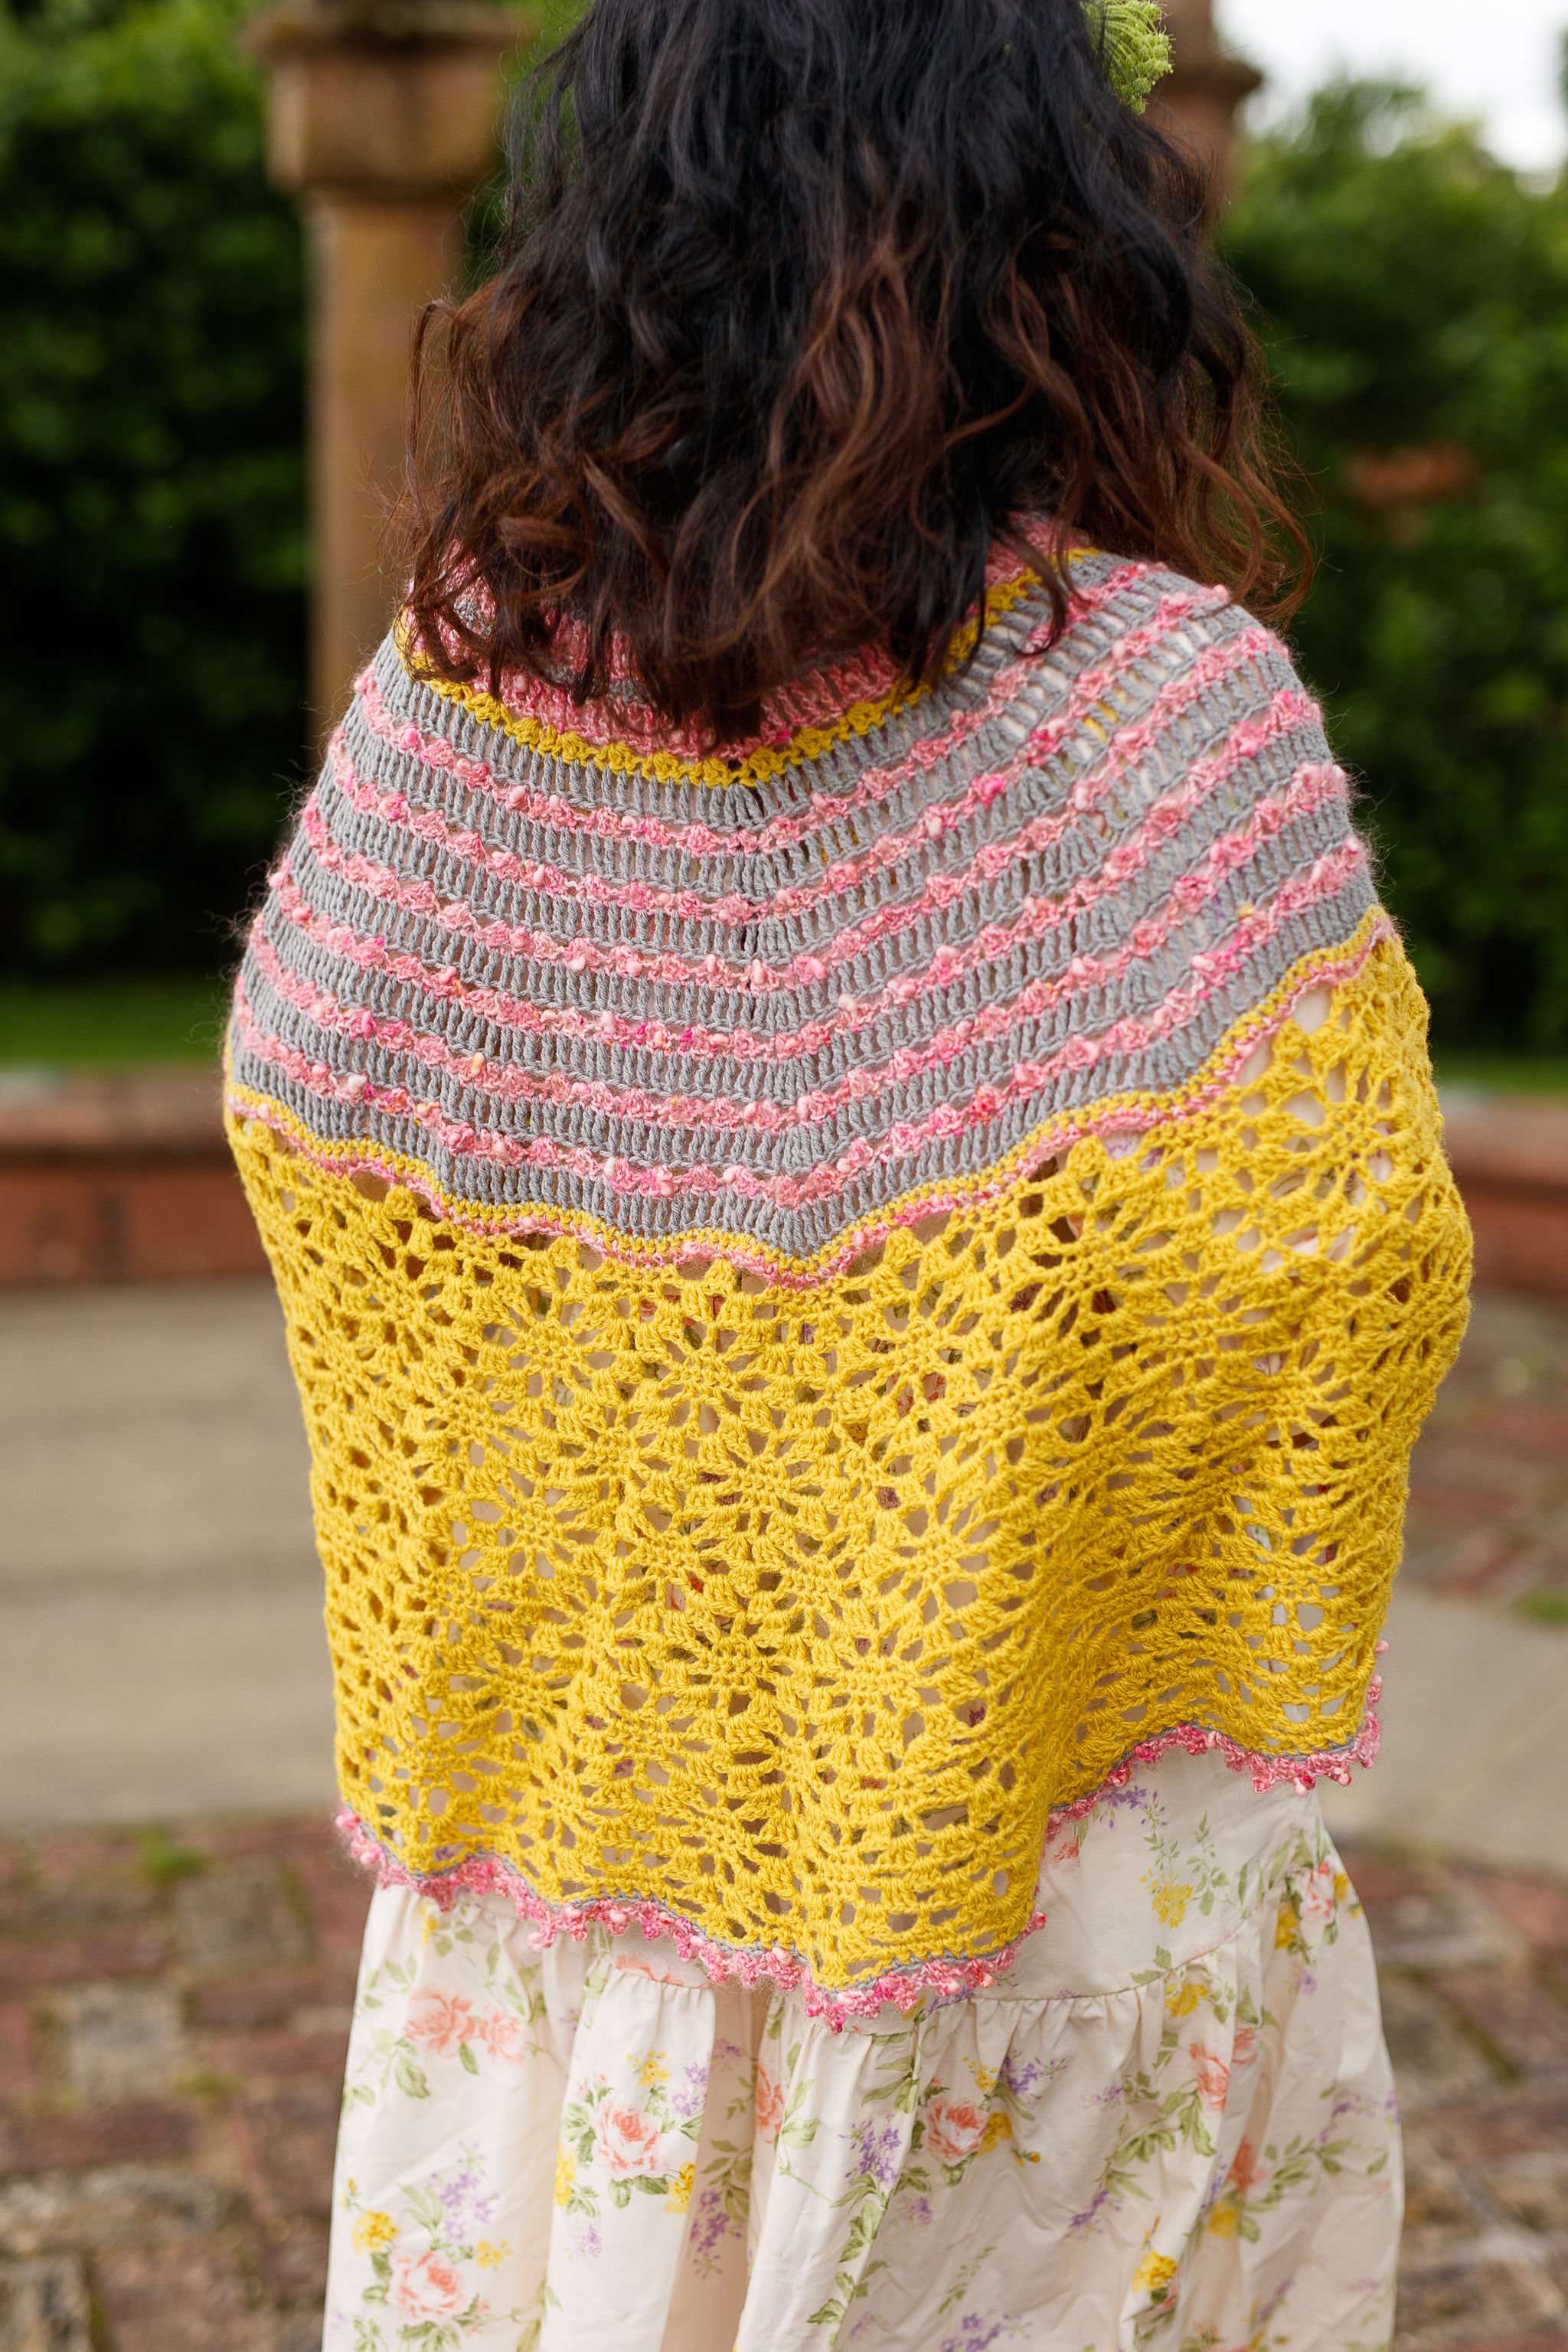
ITEM TWO - Dawn to Dusk Shawl
A stunning show-piece of a shawl to flounce around in all day, and maybe all night too. Handcrocheted by Designer Eline Alcocer using pure wool and a blend of wool/nylon and mohair/nylon.
Size - 160cm wide / 72cm deep
Starting bid 50EUR
W H E R E
The auctions will take place here, in the comments section of this blog post.
W H E N
Friday 22 December. Bidding will open at 9:00 CET, and close at 21:00 CET. Bids received after this point will not be valid. The highest bid wins.
H O W
To bid, simply leave a comment stating the item you are bidding on, and how much you would like to pay (please note the starting bids). Once bidding has ended, the winner will be notified via email. Payment will be due via PayPal within 5 days of this email being sent out. Non-payment after this date will result in the next highest bidder winning the item.
Postage - I will cover postage to anywhere in the world, but please note that the bidder is responsible for any import fees.
A N D F I N A L L Y
Let me be clear.
I cannot and will never understand what it feels like to be Jewish or Palestinian. To offer my opinion as a white person in the global North would not be a valuable contribution, to say the least. What I will state, however, is that I am against the oppression, abduction and murder of any peoples in any circumstances, and that I fully support calls for an immediate and lasting ceasefire.

F OR T H E C R O C H E T E R S


HAVET SHAWL RIFF - how to incorporate lace and two colours into the wings
The Havet Shawl pattern was originally designed for a rustic, very woolly wool - the kind that still smells a bit sheepy when you unwind the skein. The colours are deep and rich, picking up the natural dark hues of the Zwarbles fleece that is part of the blend. And most importantly for the finished look and feel of the shawl, it blooms with blocking, fluffing out into the gaps between stitches. As a result, the first, blue and green sample of Havet is lightweight, incredibly soft to the touch, and also very warm.

To recreate this original sample it's important to use a similarly untreated wool, but this is by no means the only option. Indeed, part of the fun in both designing and making is to see where the combination of stitches and yarns take us, how much we can bend the 'rules', etc.
In making another sample I really just wanted to have fun with colours without worrying too much about how the yarn would behave. I'm sure I'm not the only one who's been wooed by the bright, popping colours and speckles that can be achieved on superwash-treated merino. The hand-dyed ones, the one-offs, the really special treats... The three skeins I used for my second Havet are all slinky, smooth superwash merino yarns. The dappled green {oh how I was sold on that dapple!} and the coral pink are single-ply, while the yellow is a 4-ply of which I had lots of tiny leftovers.


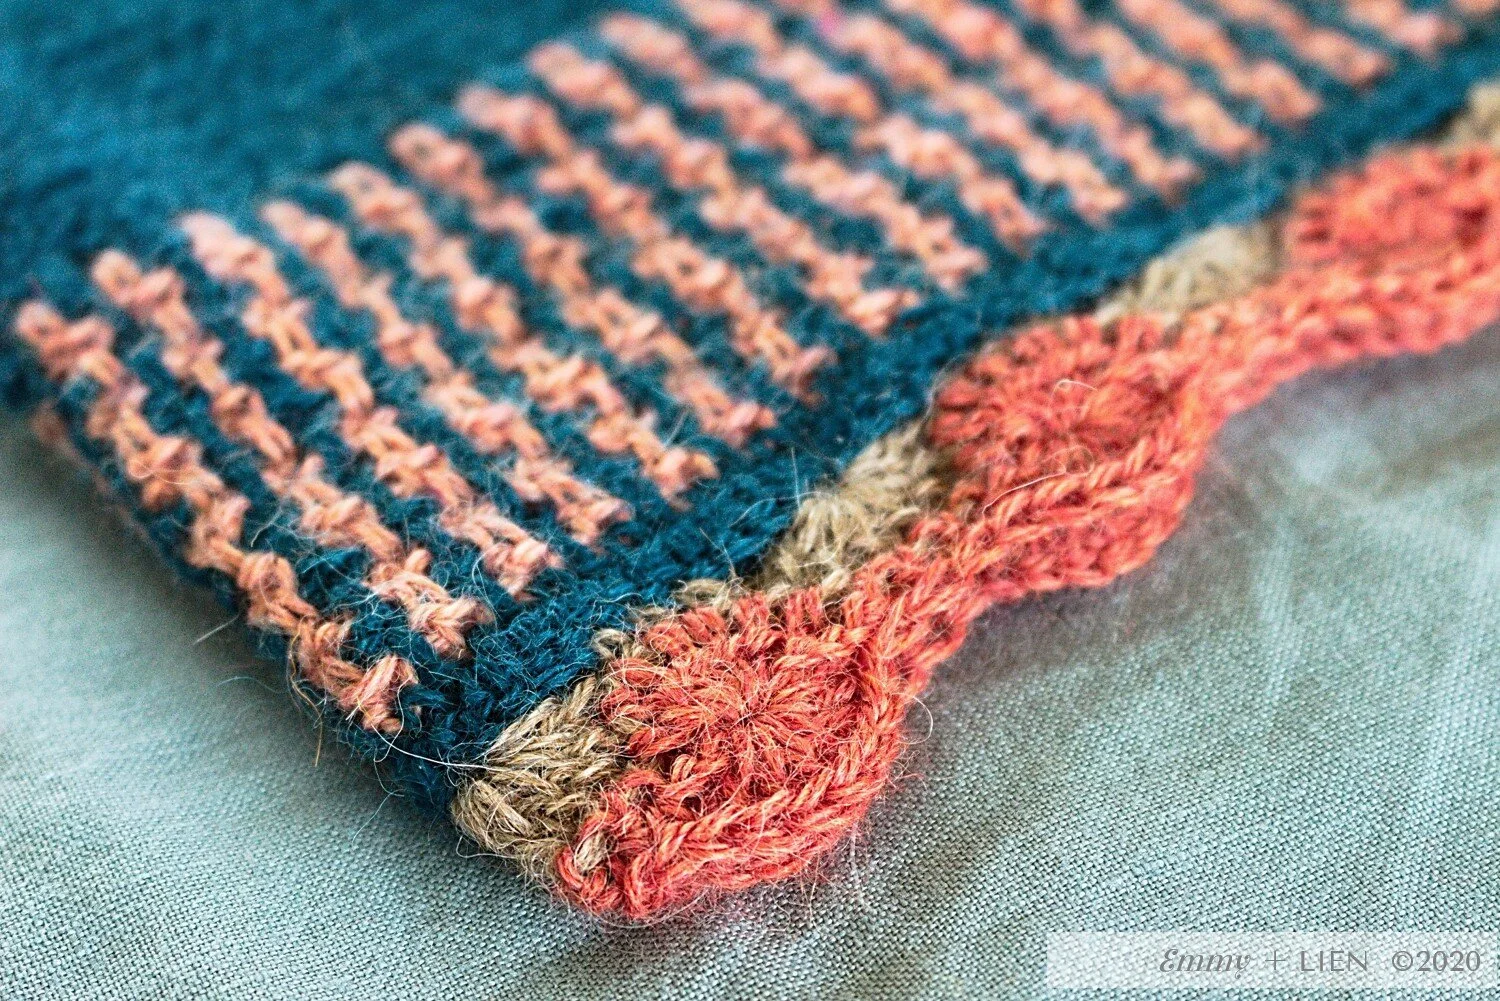
I knew that the resulting shawl would be very different from the original. Superwash yarns are kind of compact, and they barely change with blocking. You can stretch them into whatever shape you need, but the fibres that make up the strand won't shift at all. They certainly won't go fluffy and fill in any gaps between stitches, so a shawl made at a gauge as loose as this pattern calls for with a non-SW will be quite translucent. As the photo below demonstrates, the stitches in the original sample on the right are a bit fuzzy, while the ones in the second sample on the left are much crisper and the gaps between the stitches in green are more noticeable. Which one you choose really comes down to personal preference - a pattern may guide you but there is no right or wrong.
As well as the difference in style and texture, for the second sample I used three rather than two colours. On a complete whim, I decided to mimic the lace as I switched gradually from the dark green to the yellow in the wings of the shawl. If you want to do the same - perhaps because you have three fingering weight skeins in three colours, not two - I've roughly worked out the maths and written the instructions below. I should point out that I ignored the instructions, totally winged it (pun very much intended), and hoped for the best. Therefor, these instructions have not been tested in the same way as my for-sale patterns normally are.

HAVET SHAWL RIFF - how to incorporate lace and two colours into the wings
Dark green = colour B / Yellow = colour C
Follow the pattern until the stitch count for each wing equals a multiple of 8 + 1.
E.g.: total wing st count 73 sts - 72 (multiple of 8) + 1
Somewhere close to a multiple of 8 + 1 is fine too; Just skip fewer or more stitches in the first extra lace row as needed. Any wobbly edges will be blocked out anyway.
Extra row 1 (lace row): In C, [ch 3 (counts as 1 TC), TC 1] in first st, skip 3, *ch 1, [TC 1, ch 2, TC 3] in next st, skip 3, [TC 1, ch 1, TC 1] in nect st; rep from * until 8 sts rem to central lace panel, skip 3, ch 1, [TC 1, ch 2, TC 3] in next st, skip 3, TC 2 in last wing st, work appropriate lace row in A, change to C, TC 2 in first st, skip 3, [TC 3, ch 2, TC 1] in next st, ch 1, *[TC 1, ch 1, TC 1] in next st, skip 3, [TC 3, ch 2, TC 1] in next st, ch 1; rep from * until 1 st rem, TC 2 in last wing st, turn.
Extra row 2 (lace row): [Ch 3 (counts as 1 TC), TC 1] in first st, skip 1, *skip 3, [TC 3, ch 2, TC 1] in next ch-sp, ch 1, skip 4, [TC 1, ch 1, TC 1] in next ch-sp; rep from * until 10 sts rem to central lace panel, *skip 3, [TC 3, ch 2, TC 1] in next ch-sp, ch 1, skip 4, TC 2 in last wing st, work appropriate lace row in A, change to C, TC 2 in first st, skip 4, [TC 1, ch 2, TC 3] in next ch-sp, skip 1, *skip 3, [TC 1, ch 1, TC 1] in next ch-sp, skip 4, [TC 1, ch 2, TC 3] in next ch-sp; rep from * until 4 sts rem, skip 3, TC 2 in last wing st, turn.
Extra row 3 (Up & Down patt row): In B, work first 2 sts in patt, *work next 6 sts in patt, skip next ch, work next st in patt, skip next ch, work next st in patt; rep from * until 9 sts rem, work next 9 sts in patt, work appropriate lace row in A, change to B, work next 9 sts in patt, *work next st in patt, skip next ch, work next st in patt, skip next ch, work next 6 sts in patt; rep from * until 2 sts rem, work next 2 sts in patt, turn.
You will now have 4 more sts than you did on the last ordinary row. Continue in pattern with colours A & B as follows:
Rep R3 of main pattern once, rep R4 of main pattern once, then rep R3 of main pattern twice. 12 sts added. Total wing stitch count should again be a multiple of 8 + 1.
Using colours C and B, repeat the three Extra rows once. 4 sts added. Using colour B, repeat R3 of main pattern twice. 4 sts added. Using colours C and B, repeat the Extra rows once. 4 sts added. Repeat R3 of main pattern once.
Switch to colour C, rep R3 and R4 of main pattern until shawl reaches desired dimensions.


As you can see, I worked the extra lace rows on the wings three times in total, and decreased the number of green rows in between each time. I used exactly one 400m skein of green, one 400m skein of yellow, and about 200m of coral. The shawl feels lacy and appropriate for mild weather. And the colours make me smile every time I look at them, which is exactly what those Special Skeins are meant to do!
What would you go for - rustic and warm, or bright and lacy?

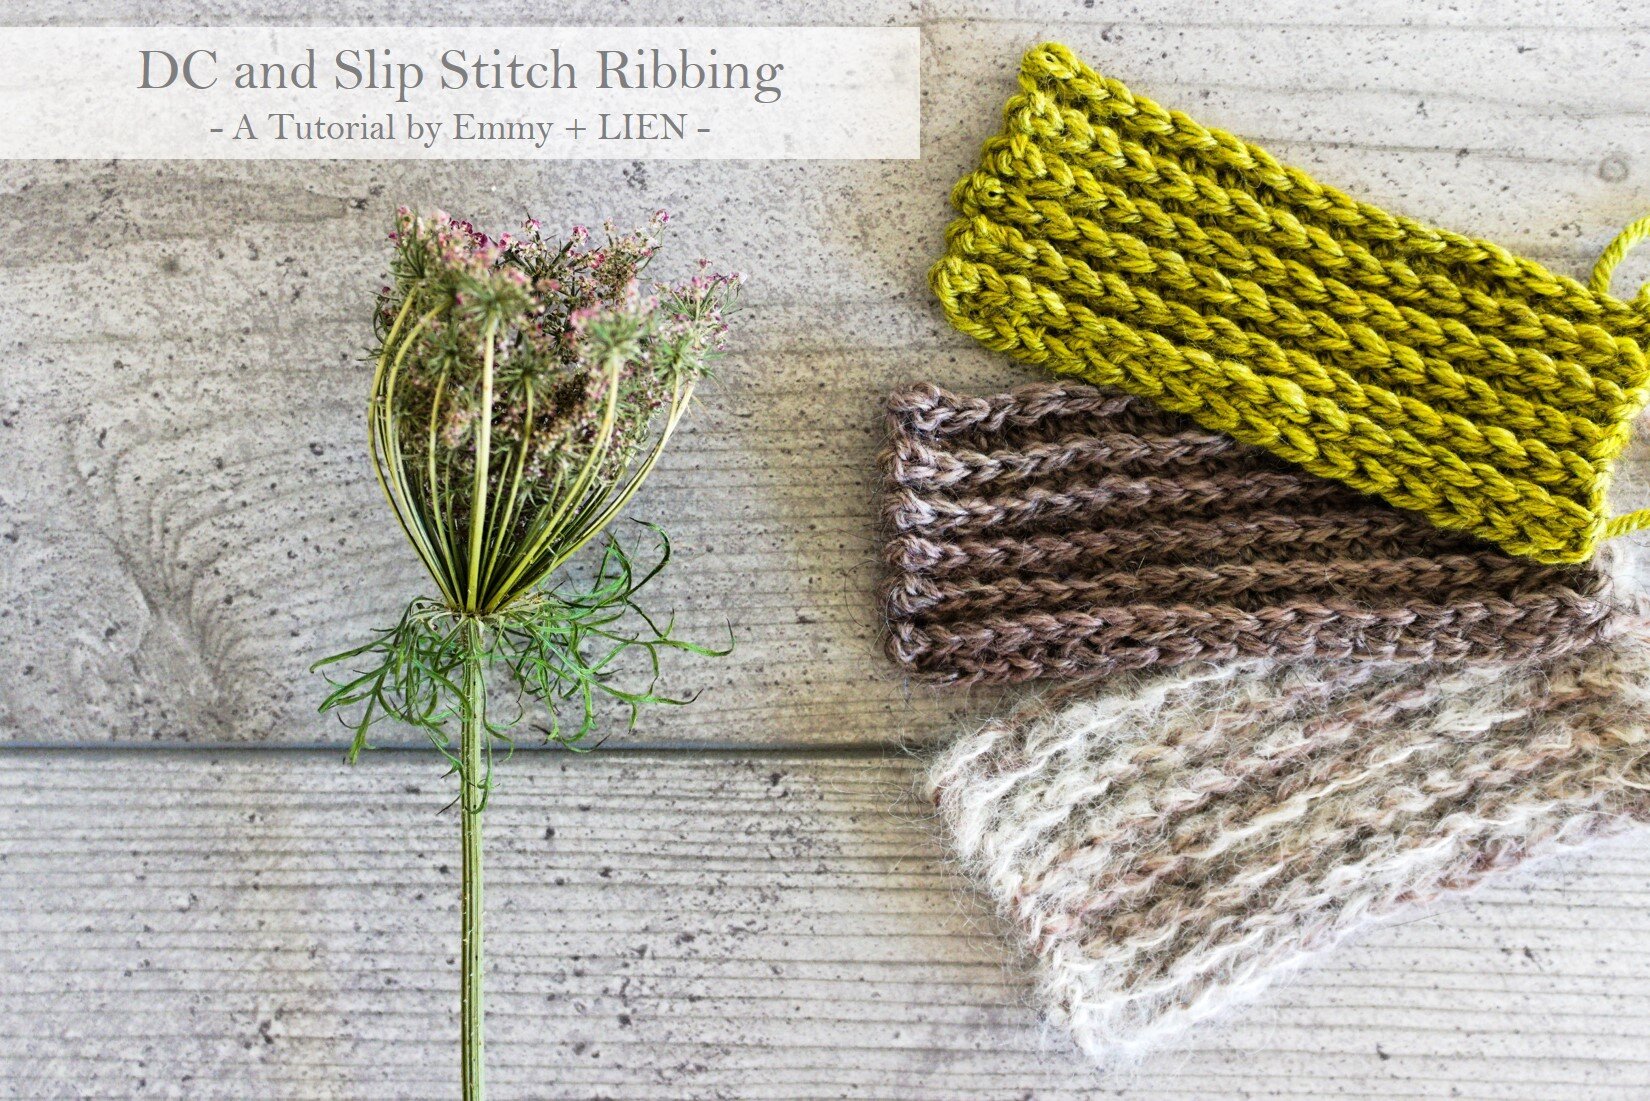
TUTORIAL: Crochet Ribbing pt. Two | DC and slip stitch
When I think about what sets apart my successful crochet projects from the not-so-successful ones (or the absolute disasters, because we all have those), I can come up with a few reasons:
Wrong yarn - wrong weight, or wrong type of fibre
Wrong fit (for garments) - everyone has a different body shape, of course, and knowing enough about what suits you - tailored or boxy? Long or short? - is very important to the ultimate success of a garment. More about that in a later post!
Poor finishing - ends not securely sewn in, ugly seaming or wrong/lack of ribbing/edging
It’s this last one that I want to focus on in this current series, because a poor finish can really ruin an otherwise well-executed project. It’s the boring bit at the end, I know, but it does make a difference. Ribbing especially can have a huge impact on to whether a garment fits properly, and how well it lasts with frequent wear.
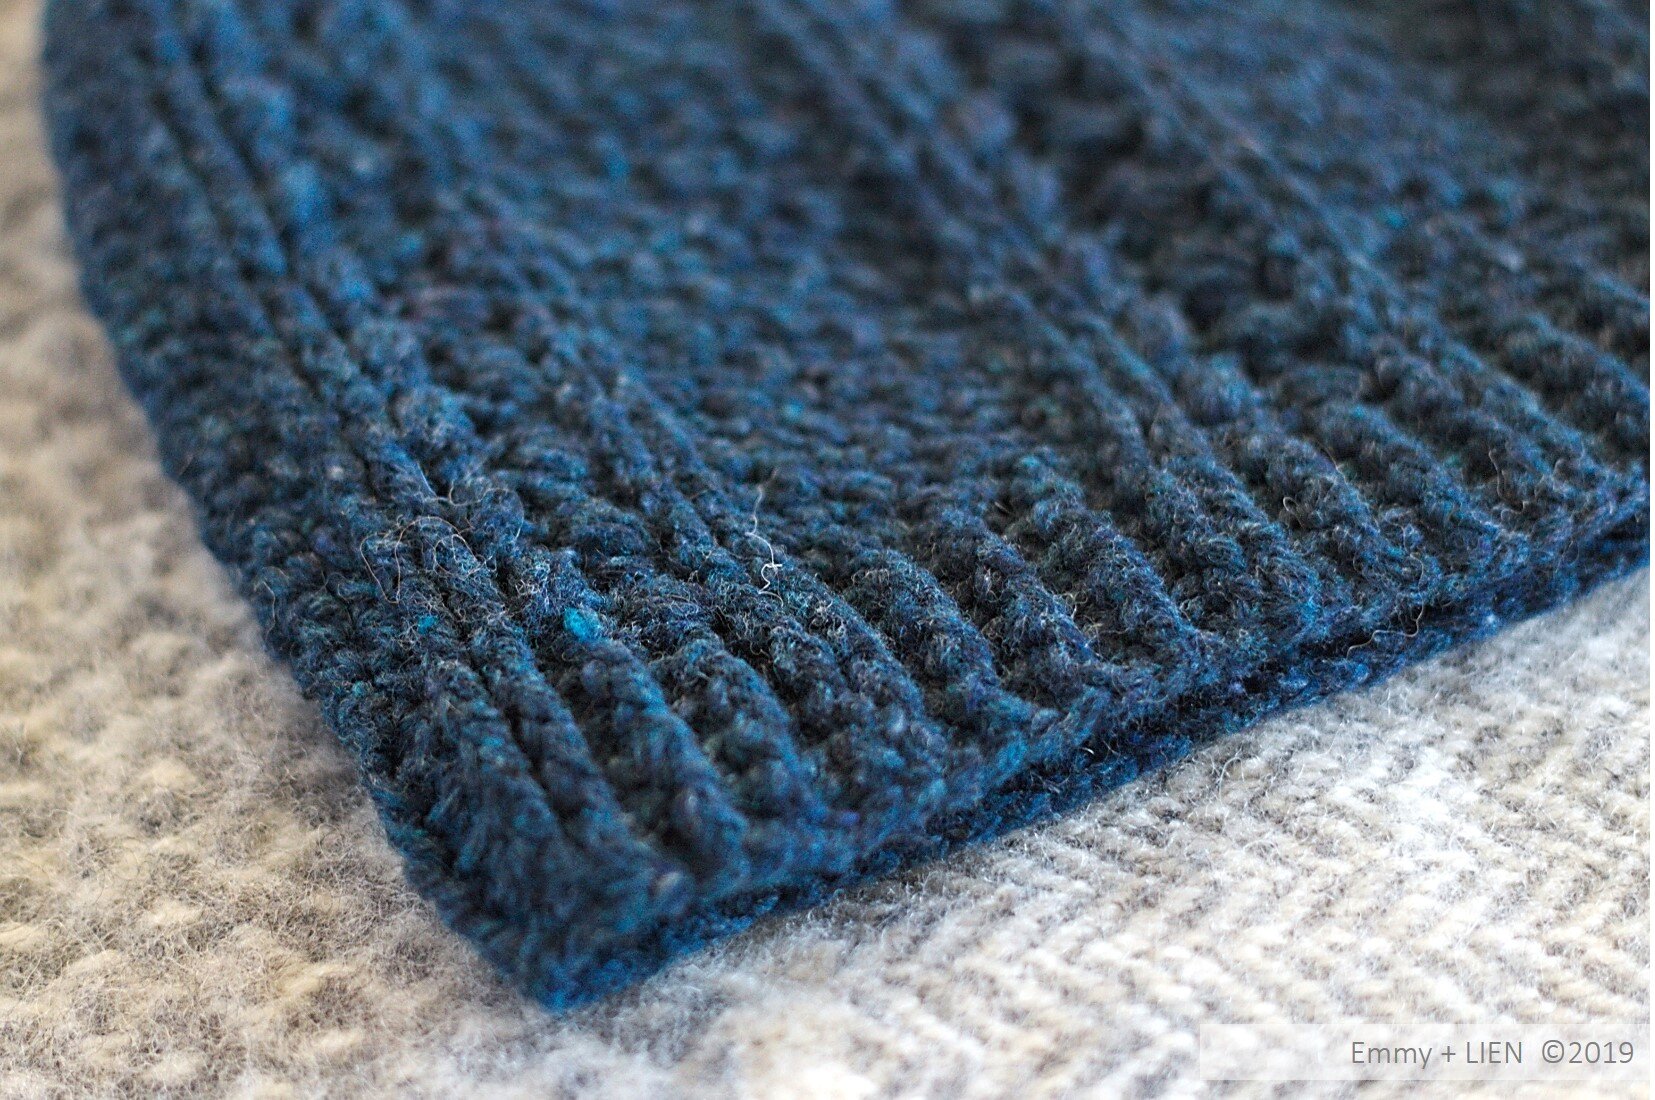
There are several ways of working crochet ribbing, each with their own characteristics - super-stretchy, or nice and neat, or just easy to do. In the second part of this series on crochet ribbing (you can see the first part here), I want to show you how to create a neat and fairly stretchy rib using a combination of DC (SC for you US folks) and slip stitches.
This ribbing is crisp with a little stretchiness, but it still “pings back” into shape quite easily, making it a good all-round technique. So far I’ve used it for the side panels of the Clifton Cardigan (to give the garment waist shaping without actually having to do any shaping! - pictured below) and the edging of the Kishie Vest.

DC and slip stitch ribbing
Use it for:
Areas that need to sit snugly on the body, such as necklines, sleeves edges and hems, or that need a bit of flexibility without the danger of becoming ruffled over time, such as hat brims. An added bonus of this technique is that the wrong side of the fabric - the side that sits against the skin - is completely flat, so it’s a good choice for anyone with sensory processing issues related to clothing.

Avoid it when:
You need a very stretchy or drapey fabric, such as on the main body of a garment or shawl, or when you need the fabric to be reversible.
Make it your own:
Experiment with different hook sizes - a small hook for a very tight and stiff rib, a larger hook for something with more give.
Increase or decrease the number of repeats when working directly into a selvedge edge; You can work more repeats for a straight, looser finish, or fewer to give you a more drawn-in effect (see instructions on attaching ribbing to a selvedge here).
To ensure the side edges of your ribbing don’t ruffle, pull the turning chain at the beginning of each row as taut as you can.
Materials
a crochet hook that is the same size, or 0.5mm less, than the size recommended on the label of your chosen yarn
Yarn: this rib works with any yarn weight or type. The final fabric will be influenced more by the inherent drape of the fibre than the ribbing technique itself.
The Technique
This type of ribbing combines rows of DC on the right side of the work, and slipped stitches worked into the Back Loop on the wrong side. The next row of DC is then worked into the remaining, unworked loop of the previous DC row. In effect, that row of slipped stitches creates a little ridge that sits on top of the DC row. When you’re new to this technique it can be somewhat tricky to figure out where to put the DC stitches in particular, so in this tutorial I’ve used two different-coloured yarn to make things clearer. You don’t need to do this, but you might want to as practice before you get stuck into a pattern.
For this tutorial, I’ve used a cotton and a wool-blend yarn in DK weight with a 4.0mm hook.
Difficulty Level
Confident Beginner
Stitches + Abbreviations
BLO - back loop only
Ch - chain
DC - double crochet (SC in US terms)
RS - right side
Sl st - slip stitch
WS - wrong side
Note: this tutorial uses UK crochet terms
Instructions
Row 1 (RS): Start with the desired number of foundation DC stitches (or make a starting chain, then work one row of DC sts). Turn

Row 2 (WS): 1 ch (does not count as a st. Pull taut), 1 sl st in BLO to end. Turn


Row 3 (RS): 1 ch (does not count as a st. Pull taut), 1 DC in remaining, unworked loop of the previous DC row.


Repeat rows 2-3 as required.

Copyright notice:
You may not reproduce, either partially or in full, any of the photos or the text contained in this tutorial without obtaining written permission from me first.
Thank you and happy crocheting!

Maker's Maintenance - Getting the most out of your knitwear and crochetwear
A while ago I ran a poll on Instagram, asking whether anyone wanted to see how I look after my knit & crochet wear. The overwhelming response was "yes", …

A while ago I ran a poll on Instagram, asking whether anyone wanted to see how I look after my knit & crochet wear. The overwhelming response was "yes", but then WOOSH SeptOctNovBERBERBER happened, there was no light to photograph anything by, the kiddos were off school, etc etc. Here we are in late November (well into the woolly season for us), and I haven't shown anyone a thing.
BUT Lo and Behold we got some good natural light last week. So. Would you like to see how I look after my yarny things?
To my mind, rather a lot goes into "looking after" your clothes, starting from before you even make a purchase (whether that be for a finished item or for the materials to make one). To simplify things, however, let's assume you have yarny things in the wardrobe, and you want them to last. Then, let's make categories:
General care
Fixing problems
Resources
1. GENERAL CARE
It may sound rather obvious, but caring for your yarny items can extend their lifetime significantly. Although everyone has accidentally shrunk a wool sweater in the washing machine at some point, it really is worth taking time to learn how to clean and store things properly.
CLEANING
Before you do anything, ask yourself whether your item really needs washing. Could you air it out instead, or spot-clean with a damp cloth? If only a proper wash will do, try to:
Handwash, or machine wash on the delicate/wool cycle, using just a little bit of wool/silk detergent. Pad out the load with a couple of bathroom towels to prevent excessive spinning.
Tackle stubborn stains with sunlight rather than harsh detergent.
STORAGE
In most parts of the world it's really hard to stop fibre-loving critters from getting into your home, so the best thing to do, at the very least, is to stop them from getting to your clothes. Storing your items properly will also help prevent them stretching or becoming misshapen.
When your items are in use:
Place any items bought second-hand in the freezer for at least three weeks, to kill off any moth eggs and such.
Store sweaters and cardigans flat, not on hangers.
Use lavender sachets or cedar wood (sand lightly every now and then to release the scent) to repel moths.
Riffle through cupboards and drawers regularly, to let in air and light, and to check for pests.
Out of season
Carefully check for signs of damage, fix anything that needs fixing, wash everything, and then store in vaccuum bags or plastic containers with lockable lids.
Use lavender sachets or cedar wood to repel moths.

2. FIXING PROBLEMS
As much as I think it's important to properly look after knit & crochet wear (and all clothes in general), that doesn't mean I'm precious about using them. The only way to honour the resources that go in to producing good yarny items (whether by me or a garment worker) is to wear them. That means, of course, that even with the best care they will eventually show signs of wear. Knowing how to deal with this, and keep items looking good*, is invaluable to extending their lifetime.
PILLING
Lots of fibres pill, from cheap acrylic to super-fancy, hand-dyed merino. I don't think there's much you can do to stop it (besides choosing a hard-wearing fibre, like Lettlopi wool, in the first place) but it is quite easy to solve: get a de-piller. With a little effort, yarny things look like new again (check out the difference on the socks below!). I have a wool comb as well as an electric de-piller. The latter is a bit of an investment, but worth it to me; all four of us wear wool for at least six months of the year, and it also helps me to keep my samples looking fresh for photos and shows. At the beginning of autumn I stick on a podcast and set to work on all the sweaters, hats, and socks. It's strangely therapeutic...
Remember: Gentle does it, even if it takes a little longer. Keep your fabric flat while you depill, and go very easy with fine fibres.

Handknitted stripey socks, halfway through a de-pilling session
HOLES
Again, you can minimise the risk of getting holes by choosing hard-wearing fibres to begin with, and working to a tight gauge will also help. Otherwise, however, holes are kind of inevitable. My kids knock through their knees, I seem to have spikey elbows, and socks especially wear thin quickly. I really don't think a hole should spell the end of a garment's life, so over the years I've collected lots of mending materials as well as techniques. I won't lie; It's rare for me to actually get to the bottom of the mending pile, but I do try to plug away at it regularly.
My favourite techniques for yarny items are:
Darning - Probably the most time-consuming and fiddly fix, but I love how it looks. I use thrifted darning wool and leftover sock yarn, and don't worry about matching colours at all. It becomes a little creative outlet in itself.
Patches - Much as I love darning, really big holes on elbows and knees are sometimes just easier to patch. I like these knitted patches by Purl Soho, although I often use leftover bits of woven fabric as well. Etsy is a great place to buy ready-made wool patches.
Swapping out parts - For very frayed cuffs, the easiest fix might well be to simply swap them out. You can buy ready-to-sew ribbed cuffs, or make your own. For the kids fleece below I plan on using the legs of a pair of holey wool socks that I just didn't feel like darning. I’ll let you know how that goes!
Embroidery - More of an embellishment than a fix, and definitely not a quick one at that, but very fun to do.

STRETCHED/MISSHAPEN
Sometimes the reason an item is shoved to the back of the cupboard is because it's got so stretched it just doesn't fit anymore. No amount of de-pilling is going to make it look good. I find it intensely frustrating when this happens, because the cause of the stretching is often precisely the item having been so well-loved.
If the item is only a little stretched or misshapen, the first thing to try is to re-block it. If the item was made with a fibre that has "memory", such as a non-superwash wool, that might be enough to save it. If not, it's time to get creative (and a little brave, probably).
Reknit/crochet the problematic portion - Depending on how the item is constructed, you might able to work straight into the edge. I covered dealing with stretched hat brims previously. Otherwise, you will have to unravel or cut off a part, pick up live stitches, and re-knit/crochet from there. There are some good tutorials to be found on Pinterest for this.
Get the sewing kit out - Sometimes the best option is to look at the item from a tailoring point of view, and take in hems/seams or add a thin elastic.
Alter the thing completely - If taking in seams is likely to add too much weird bulk where it shouldn't be, and reworking a portion is just too hard, go for the chop. Re-work it into something totally new. The photo below shows a top and skirt that started life as a (shop-bought) above-the-knee dress. A very well-loved dress, until the bottom part stretched too much for its length. I didn't think I'd be able to take in the sides, nor re-knit the cabled bottom in a way I'd be happy with. So I cut it in half at the waist. The bottom half became a below-knee skirt, for which the A-line shape was perfect. I then added a couple of sections to the top-half, to make that part wearable too. It did take a while and tested all my sewing/knitting skills, but I now wear both items regularly (again).

3. RESOURCES
HOW TO WASH WOOL - a more detailed blog post from MamaOwl, with great tips and a few FAQs
HOW TO GET RID OF CLOTHES MOTHS - another useful post from MamaOwl
VISIBLE MENDING - a beautiful, clearly-written book by maker Arounna Khounnoraj
MODERNE BRODERI - a GORGEOUS book on embroidering knitwear and clothing, by Warunee Bolstad (currently only available in Norwegian, but the Plystre site has kits and a short tutorial in English too)
BUYING SECONDHAND - though not related to caring for your knits, I had to include this series of Instagram stories by Africa from The Vitamin D Project. Her IG account is like an ode to all things woolly, she’s recently launched a website, and I love it all.
Do you have any tips for getting the most out of you knit & crochet items? Is there anything I’ve mentioned that you particularly love doing, or struggle with?? I’d love to hear about it in the comments!
* I want to add a note about the cultural sensitivity associated with wearing clothes that look "good". I'm fully aware that, as a thin white woman of obvious economic means, there is no danger in walking around in clothes that have been visibly patched up. Quite the contrary - "visible mending" is incredibly trendy and I would be lying if it didn't do my career any good; More than once I've been paid to mend or alter items for friends, after they've seen what I'm wearing. I very much doubt that would be the case if I were Black, or plus size, or visibly disabled, given all the tropes around wealth and skill that surround these marginalised groups.
I'm also aware that doing all of the things I've listed takes resources. Time, money, skill, in some way or form. Not all of us have them, nor can we be expected to obtain them. Do what you can, if you can.
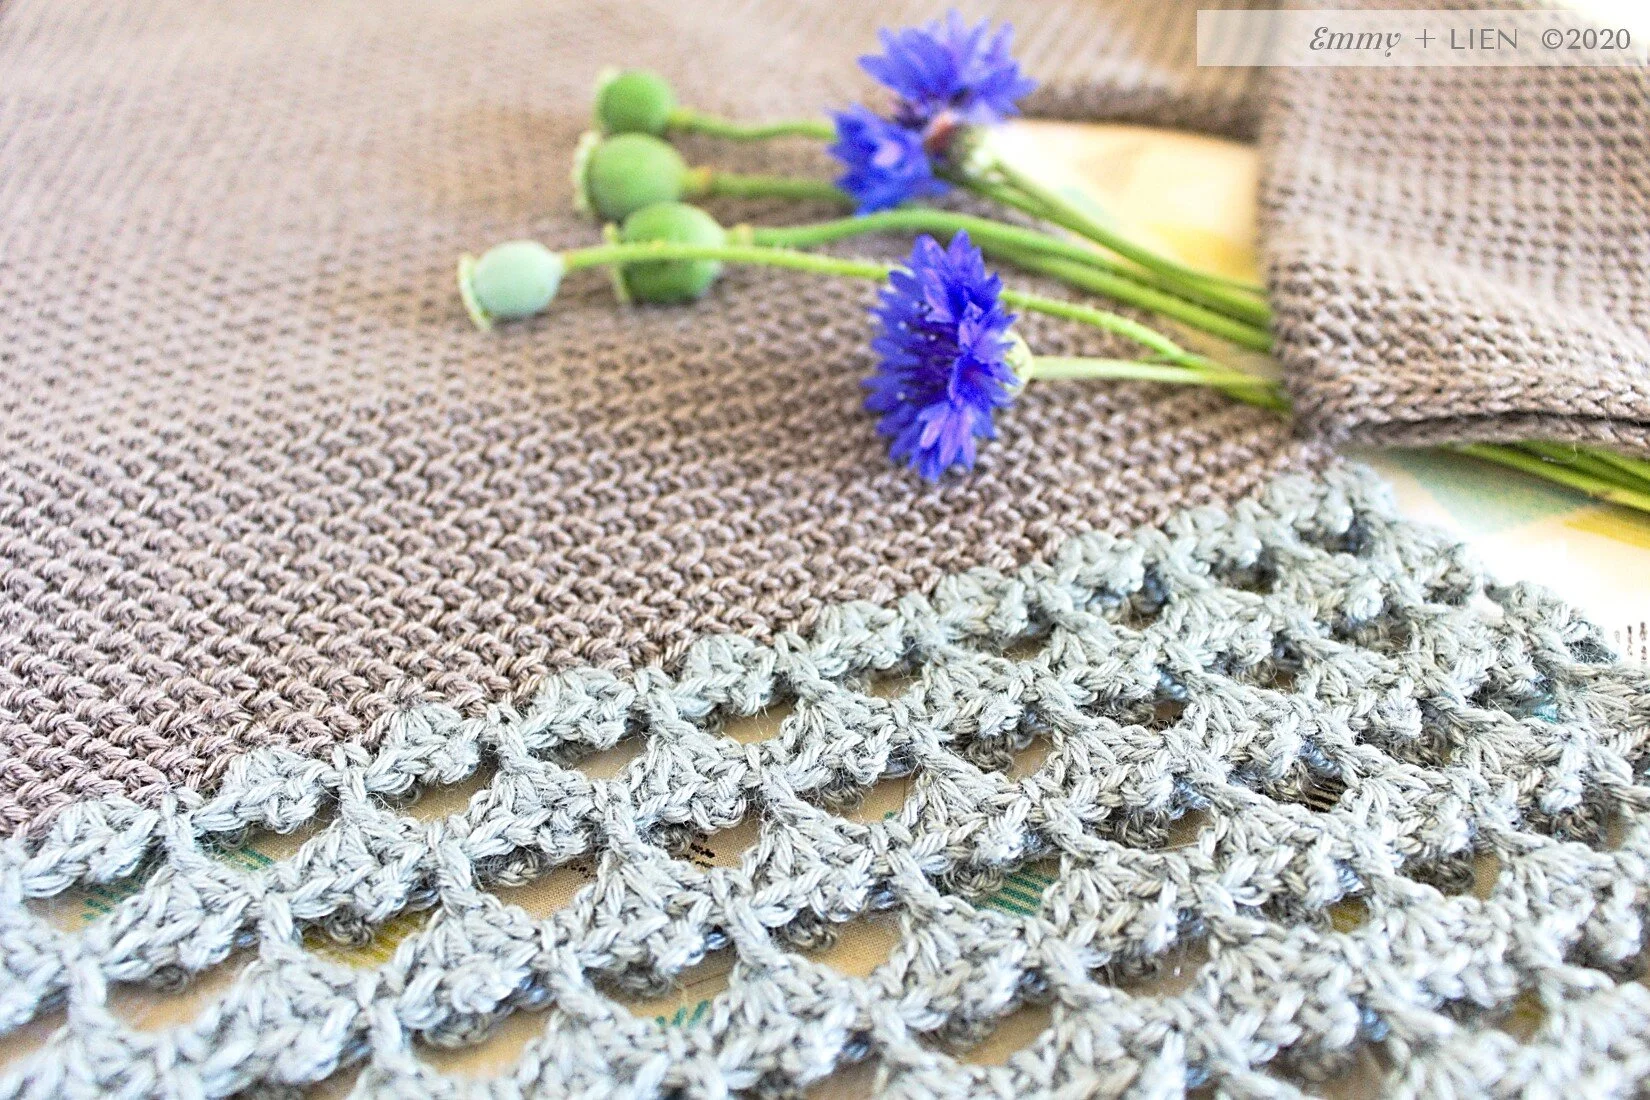
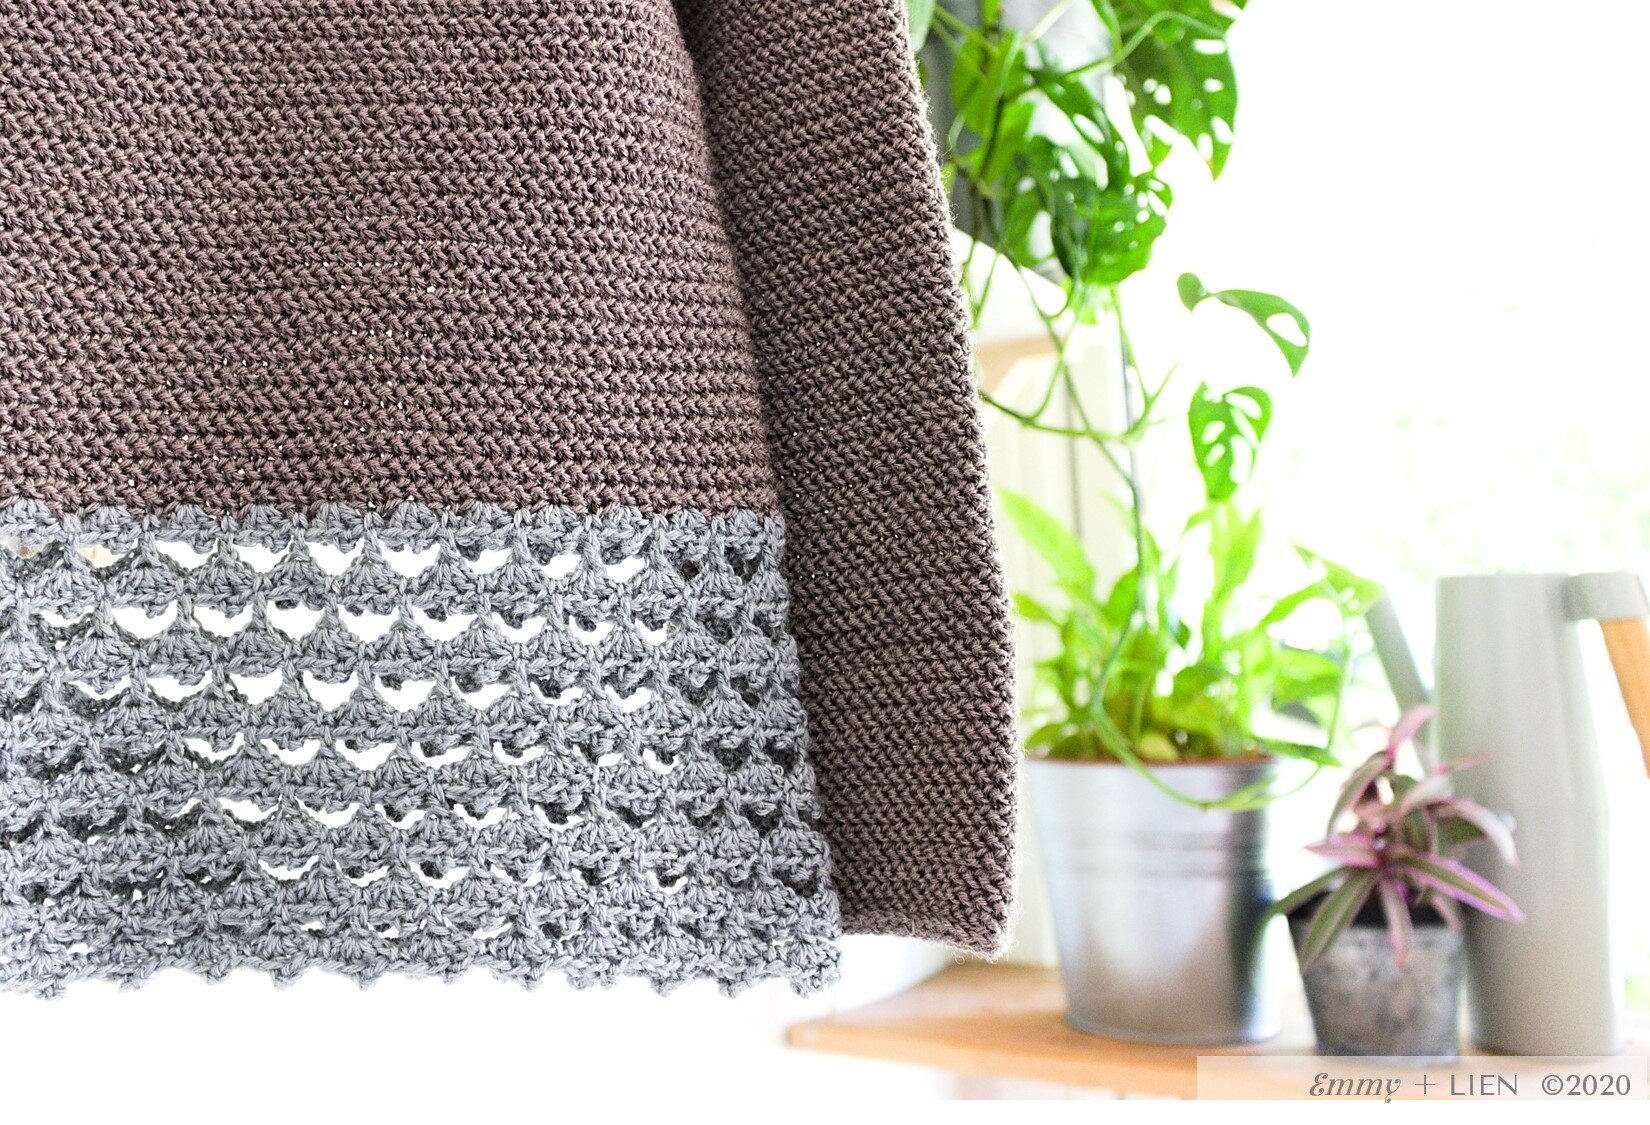
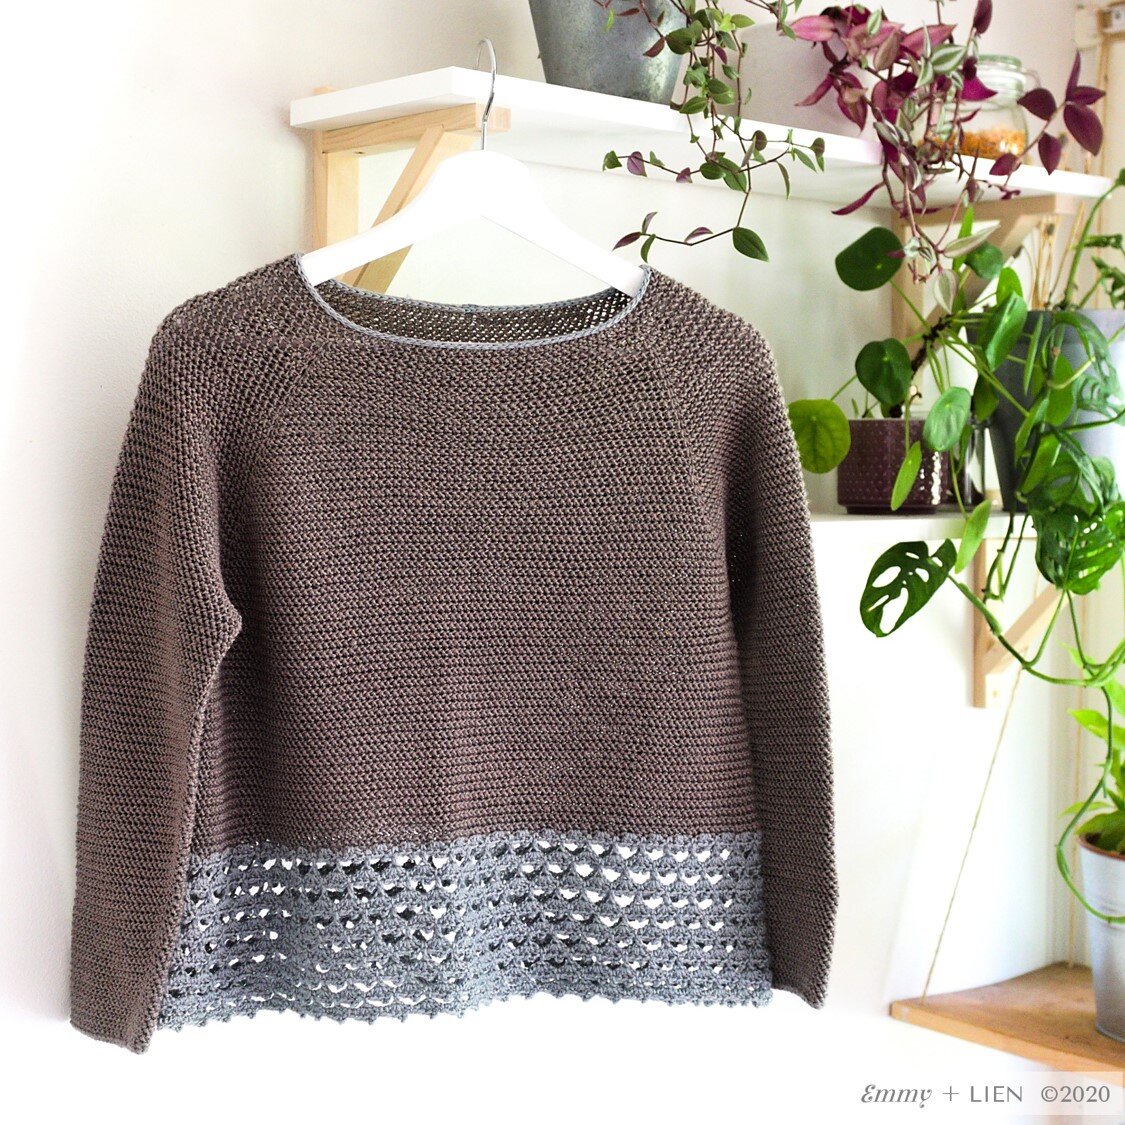
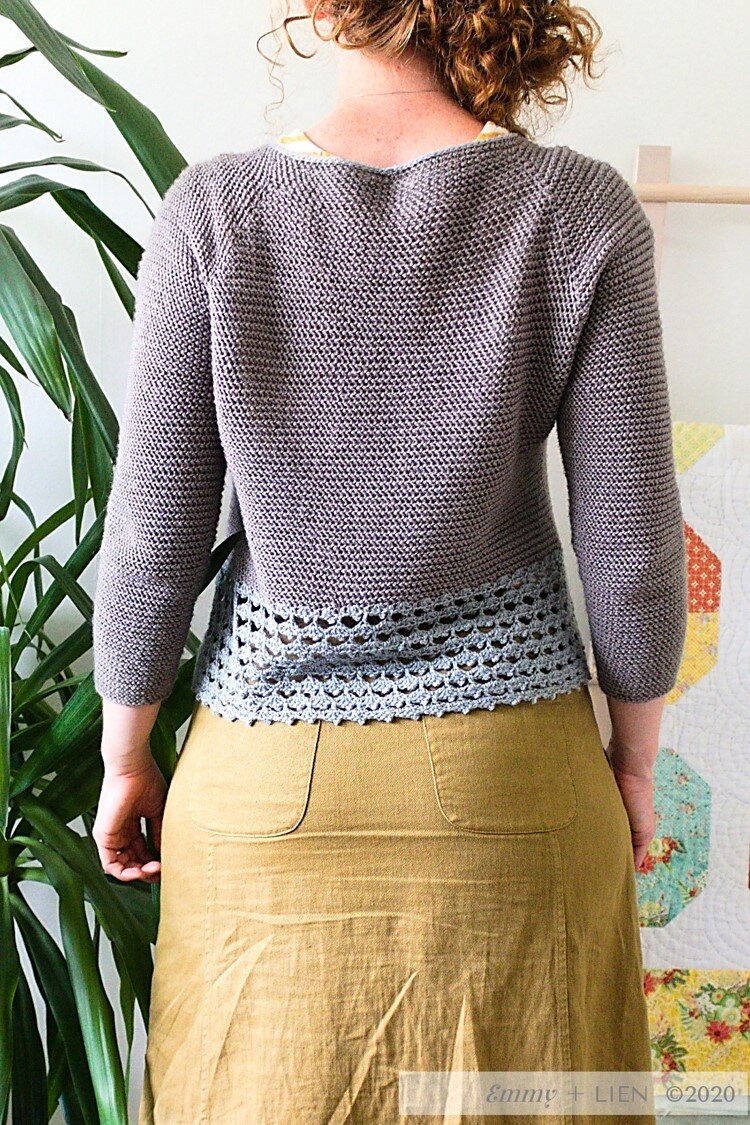
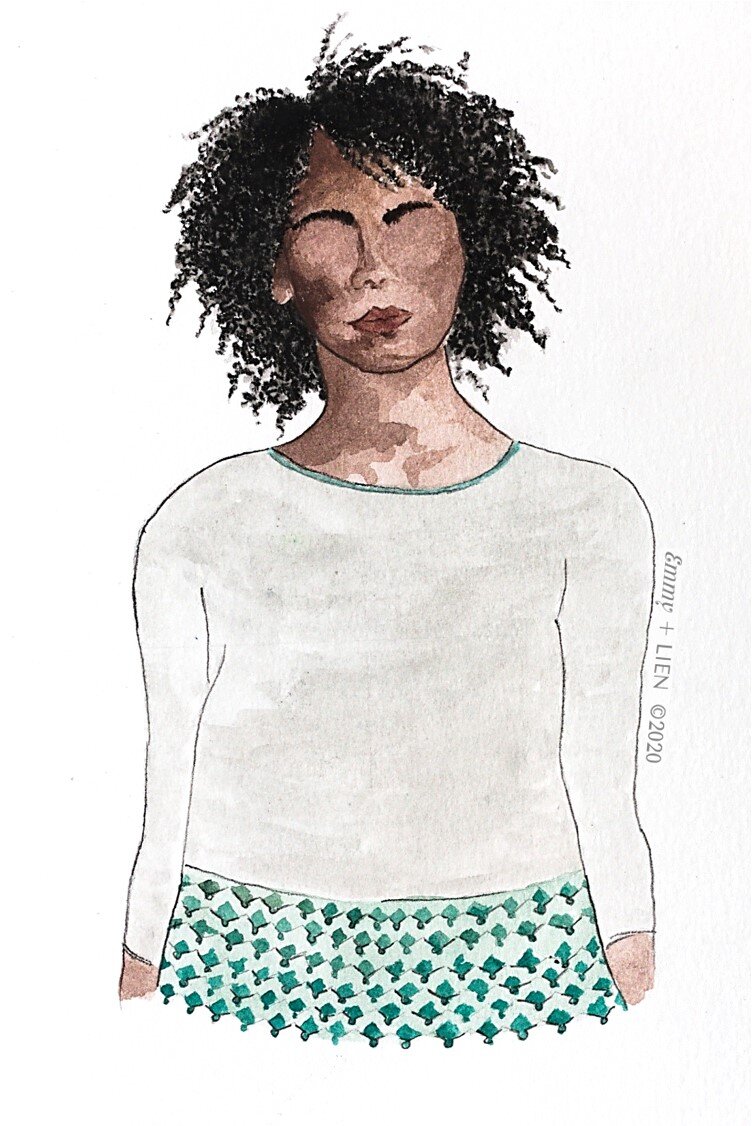
OFFICIAL PREVIEW: DROPPE SWEATER


SIZES 1 (2, 3, 4, 5) {6, 7, 8, 9, 10}
Finished bust circumference: 71 (81, 92, 102, 112) {122, 132, 142, 152, 162} cm / 28 (32, 36, 40, 44) {48, 52, 56, 60, 64}”
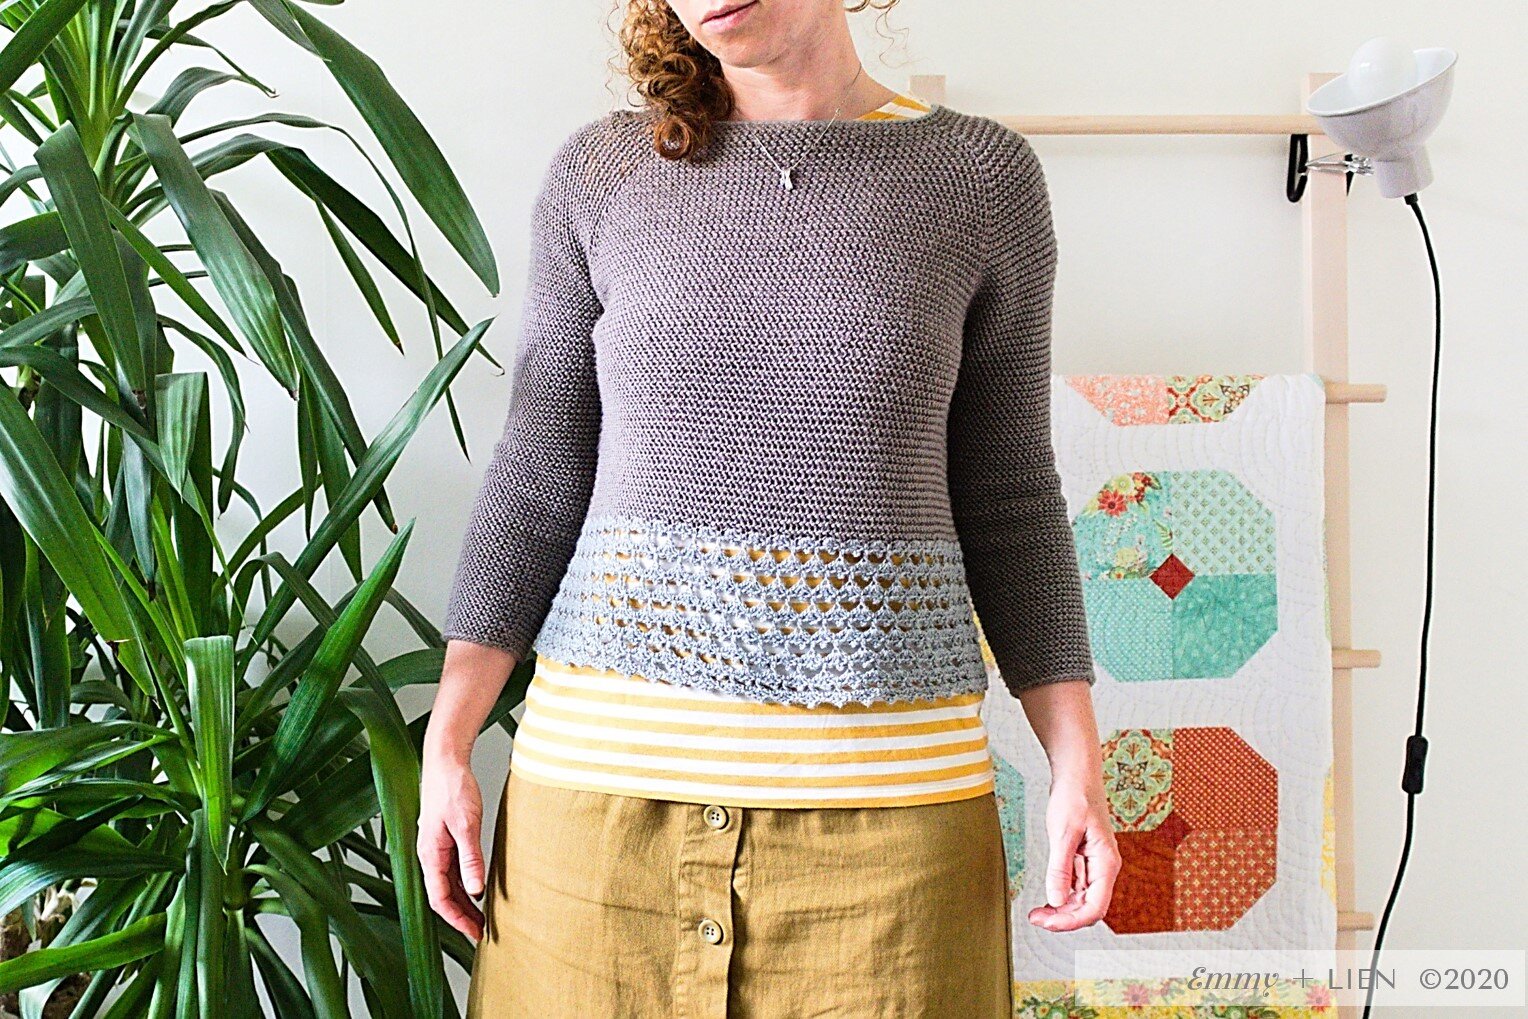
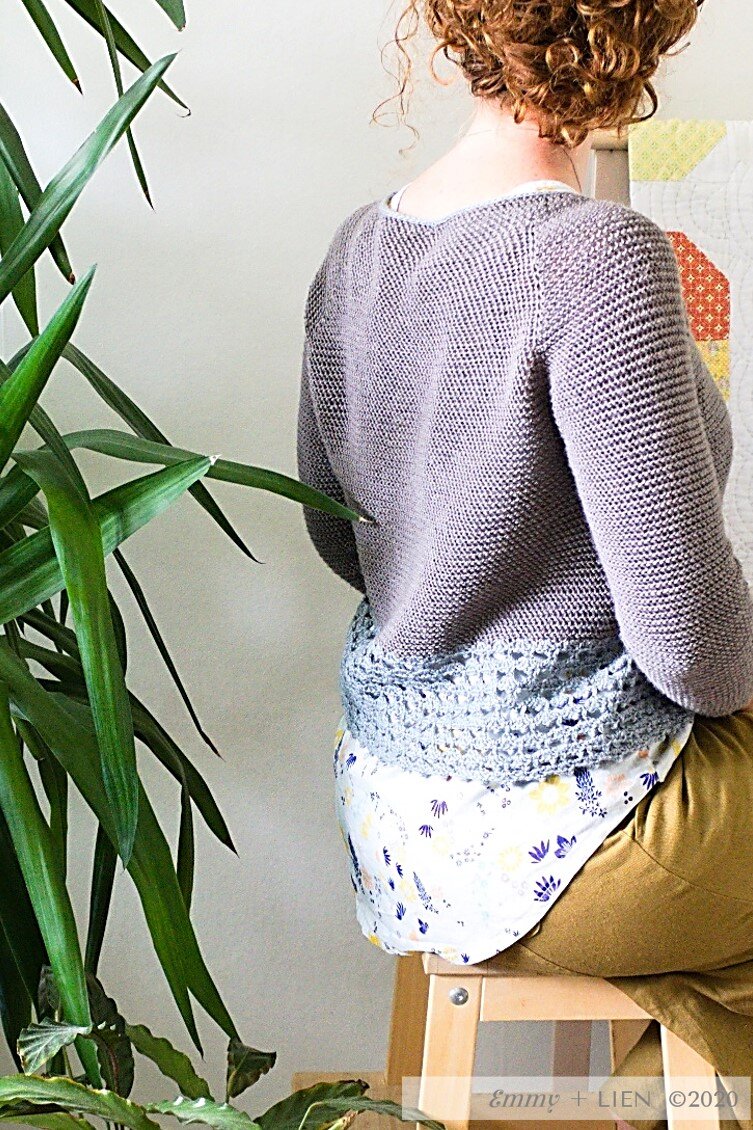
SHAPE & FIT
Droppe is intended to be worn with 5-10 cm / 2-4” of positive ease around the bust, zero ease around the biceps, and 7.5-12.5 cm / 3-5” positive ease around the hips. This means it will fit loosely around the bust, have lots of swing around belly/hip but feel more snug around the arms. As this sweater has a top-down construction, however, it is easy to adapt it as you go to suit your shape and preference. Pattern includes directions on customising shape & fit.
Eline has an 86cm/34” bust, 92cm/36” hips, and 29cm/11.5” biceps. She wears a size 3.
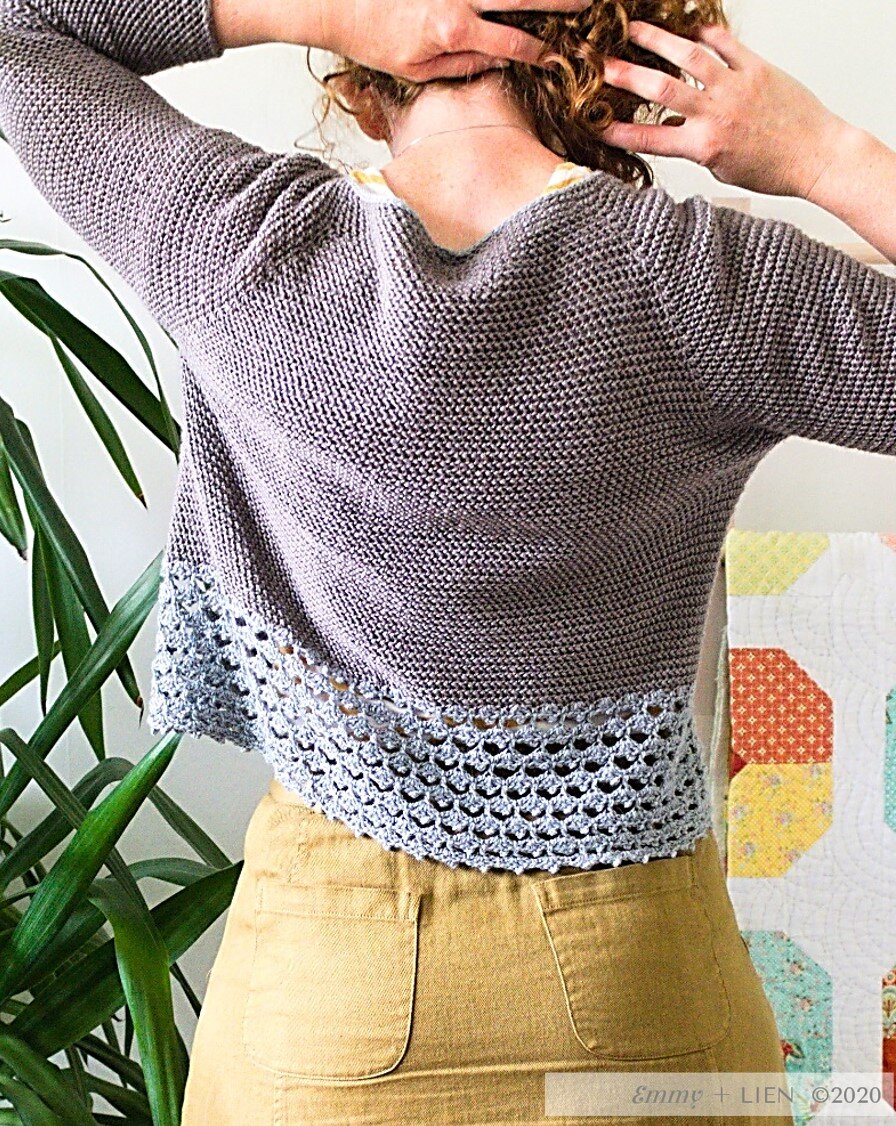
CONSTRUCTION
Droppe is worked from the top down in a completely seamless raglan construction. Short rows raise the back slightly. Invisible increases are incorporated after separating for body and sleeves to create a swingy A-line shape. The sleeves are worked directly into the held stitches. I-cord edging provides a neat finish to both the cuffs and collar.
YARN
Eden Cottage Yarns Milburn 4-ply (fingering weight; 85% superwash BFL wool, 15% silk; 200 m / 218 yds per 50g ball) : MC: Steel (grey) - 5 (6, 6, 7, 8) {9, 10, 11, 12, 13} balls / CC: Catmint (light blue) - 1 (1, 2, 2, 2) {3, 3, 3, 4, 4} balls, 3, 4, 4} balls
Yarn Alternatives
This sweater is designed for a fingering weight yarn. Any fibre with a soft handle and gentle drape will produce good results. If using a (blend with) plant-based fibre such as cotton or linen, or a superwash wool, consider shortening the length of the body and the sleeves by 1-2cm/” to avoid excessive stretching over time.
Yardage required
MC: 1000 (1200, 1200, 1400, 1600) {1800, 2000, 2200, 2400, 2600}m / 1090 (1310, 1310, 1530, 1750) {1970, 2180, 2400, 2620, 2835} yds
CC: 200 (200, 400, 400, 400) {600, 600, 600, 800, 800}m / 218 (218, 440, 440, 440) {655, 655, 655, 875, 8751] yds
HOOKS, NEEDLES + NOTIONS
3mm hook, or as required to obtain gauge
9 removable stitch markers, in 3 colours if possible (1 for BOR, 4 raglan markers, 4 sleeve markers)
Wool needle
GAUGE 20 sts x 17 rows = 10 cm / 4” in HHTC, worked in the round and measured after wet blocking.
TECHNIQUES TO ENJOY
Foundation stitches / Herringbone HTC / Picots / Short rows / Increasing & Decreasing / Raglan shaping / A-line shaping / I-cord edge
PATTERN INCLUDES
Clear written instructions in UK terms / Stitch diagrams / Professionally tech-edited & test crocheted instructions / UK to US term conversion chart / Size schematic / Directions on choosing a size and fit, and making adjustments

For the love of tiny stitches
I can't resist the beautiful halo of a thin alpaca, nor the intricacy of tiny stitches. The way lofty sheep’s wool blooms into the smallest of gaps and trap pockets of air. A little puff stitch that sits just so, sometimes concealed…

You might have noticed that, as a rule, my patterns aren't of the quick-and-chunky variety. There's of course the odd exception (to prove the rule or, as my old English teacher put it, to bugger it up), but otherwise... It's lacy mohairs and bouncy 4-plies, a rugged DK at most.
I can't resist the beautiful halo of a thin alpaca, nor the intricacy of tiny stitches. The way lofty sheep’s wool blooms into the smallest of gaps and trap pockets of air. A little puff stitch that sits just so, sometimes concealed in folds of soft fabric only to pop out unexpectedly, delightfully. From a designer's point of view there are advantages too; Given the double-layer nature of crochet stitches, using lightweight yarns opens up possibilities that just aren't achievable with chunkier ones.
I do know that making a project in a lightweight yarn takes time. A lot of time. Often more than I have, too - when I'm making a hat as a gift or a sweater that will be outgrown by my kids in a season or two (if I'm lucky), speed matters. When it's something for me though, something that has to fit perfectly and that I will treasure for years...
It's okay if it takes a while. And it does. A sweater that I'm making as a personal project (as opposed to a work one, which I have to prioritise) can easily take me 3, 4, 5 months to complete. My first sock yarn cardigan took six months, I think? A Spring project turned into Autumn, but it was okay, still just as beautiful the next Spring.
Even if at the time, during the making itself, it sometimes feels like a bit of a battle. My children are almost-3 and 7, which puts them in the "Not Tiny but Still Quite Small" category. They still need me, a lot, and working out what I do and don't have time for is a never-ending brain teaser. I ring fence those 30 minutes at the end of every day with a fierce protectiveness. I'll squeeze in a few rows while I wait for a pot of pasta water to come to a boil, and I probably look forward to the children’s weekend screen time as much as they do. When I can involve them, even if it's just a case of making stuff alongside one another - they paint or build or make puzzles while I crochet - I do. Eventually and sometimes seemingly against all odds, the rows grow into a sweater or shawl.
I don't mean any of this in a "if I can do it, so can you", way. The only person who can understand the routines, needs and challenges in your household is you, especially at in this climate of uncertainty (as I write this Sweden has not been put in Coronavirus lockdown, but it very much feels like it's only a matter of time). Sometimes the only time-investment worth making is Quick and Chunky. But if you're in the mood for a few weeks, or months, of slowly plugging away at a swingy cardigan or a lacy shawl, I've got you covered.

The thing about hats
I’ve been bitten by the hat making bug. For years I’ve made shawls/cardigans/socks/sweaters - anything but hats, really. And now suddenly I can’t stop. I’ve even set about designing one. But it’s not ready, because the thing about hats…

I’ve been bitten by the hat making bug. For years I’ve made shawls/cardigans/socks/sweaters - anything but hats, really. And now suddenly I can’t stop. I’ve made nine since September. It turns out hats are quick, fun, and really good for using up odd skeins. Huh.
The impending festive season definitely has something to do with it. “Quick! Gift! Knit!”, I see everywhere, from chunky cables to classic rib to round-and-round-and-round sort of tubes. I get it, I do. Five of those nine hats were not for me or my own kids, not made out of necessity but for the heck of it. And seeing how happy they are, to receive something that is warm, pretty and (hopefully) a good fit has been really fun.

September Hat by Caroline Dick
I’ve even set about designing one. I thought, I only have one hat pattern in my portfolio so far, I was given two skeins of perfect, midnight blue tweed at Edinburgh yarn festival, it’d be good for a bit of end-of-year publicity, etc.
The thing about hats, however, is that they’re like everything else I design. Best not rushed. When I rush, I make mistakes or end up with compromises I later regret.
The thing about hats, whether made for yourself or someone else, is that they’re like sandwiches. They always make the receiver happy, this fact you’ve taken the time to butter the bread all the way to the edges and melted the cheese to just the right level of bubbliness and maybe even gone the whole hog with all the toppings. I ate a rye bread open sandwich piled high with nut butter, apple slices, pumpkin seeds, dates and honey at a cafe in Edinburgh. The equivalent of a perfectly slouchy, nubbly grey hat with a little cable, perhaps?
When I stuck a sample of my new design on my best friend’s head, saw how much she liked it and how beautifully it accentuated her blue eyes… I had to let her keep it. I shared that sandwich with her, too.
So I haven’t released the pattern yet. I’ve made an ochre sample and started another blue one, I’m working out multiple sizes, putting options for both a snug beany and a slouchy hat in… I won’t be able to say, “cast on this last minute Christmas gift!”, but I don’t mind. I like the idea of someone getting to this pattern in the quiet of January, or whenever suits them, of them taking their time over the tiny ridges and delighting in the little puffs that go up and up.
An act of spiritual belly-filling, in the making, the wearing and - for me as a designer - the not-stressing about “keeping up”.
See you in January?
P.S. If you do want to crochet a new hat this side of Christmas, I made some tweaks to the instructions for the Lomma Hat (it’s free"!) so they are easier to understand.
P.P. S. I will also be running a promotion cum fundraiser from 21 to 31 December, so follow my social media outlets if you want to keep an eye on that.

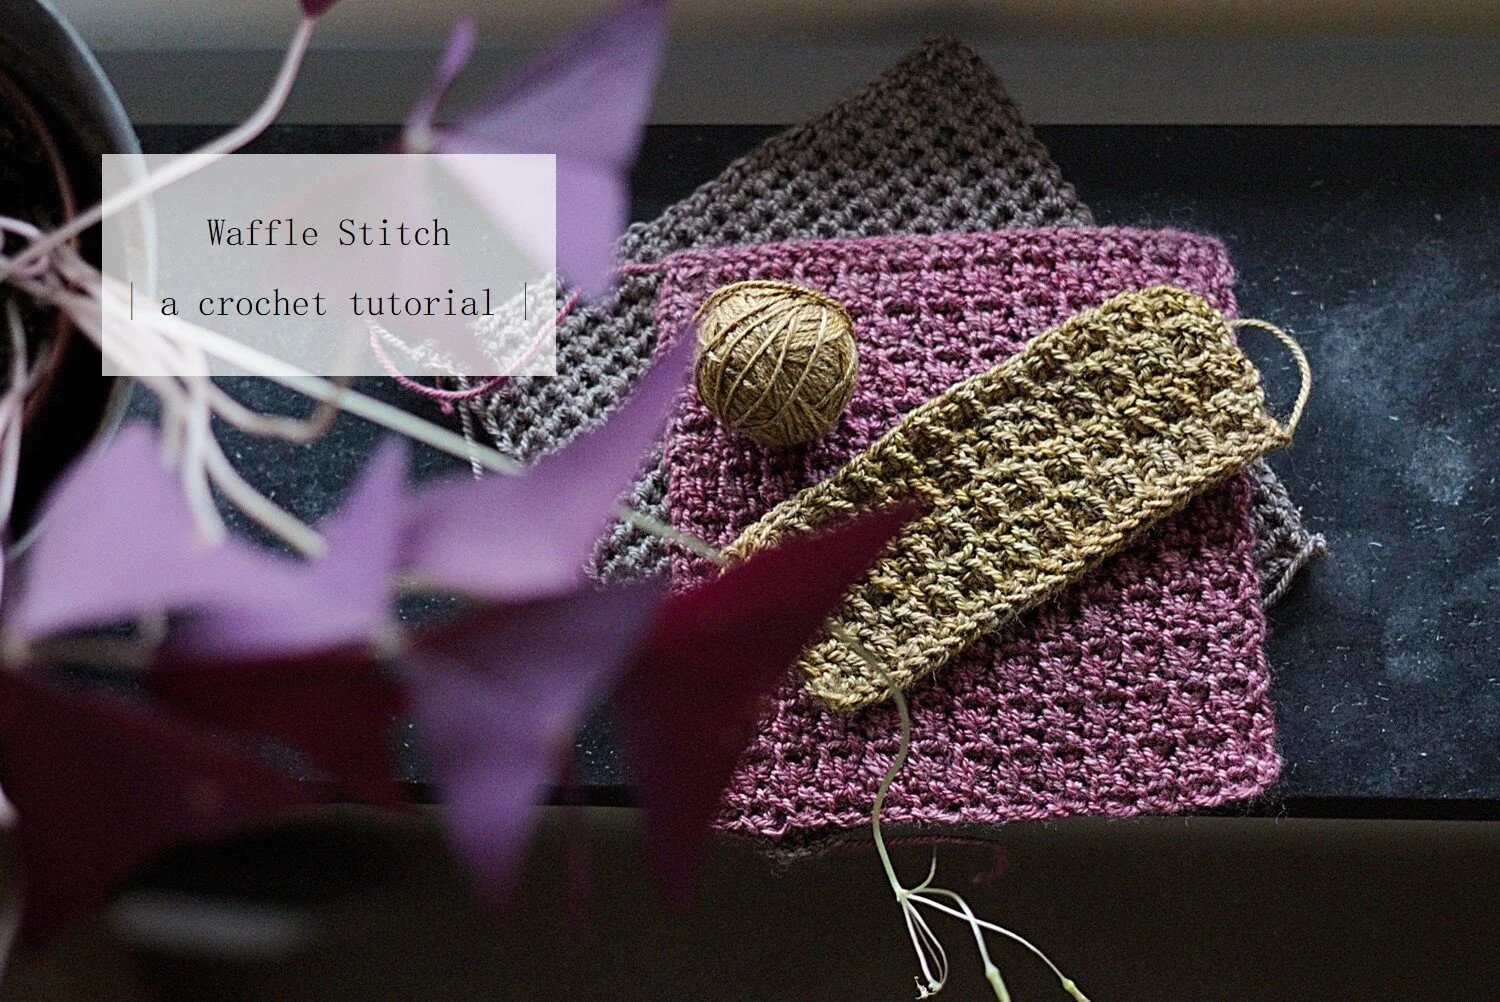
TUTORIAL: Crochet Waffle Stitch
This tutorial demonstrates how to work the crochet Waffle Stitch in a plain sample or gauge swatch, as well as how to incorporate increases.
Sometimes, the simplest stitches are the most effective. Such as the Waffle Stitch*; Although it is only an extension of the humble double crochet (single crochet in US terms), it produces the most amazing drape and texture. So much so, that when I took the sample of the Harvested Shawl to Oslo Knitting Festival, even the knitters couldn't stop stroking it. Definitely a triumphant moment for this crocheter!

This photo tutorial demonstrates how to work the Waffle Stitch in a plain sample or gauge swatch, as well as how to incorporate increases. The stitch placement at the beginning and end of each row can be a bit confusing, so I thought it best to show you both.
The yarn I'm using is Beyul Fingering by Kettle Yarn Co . It's a smooth, glossy blend of merino, yak and silk that I think really shows of the texture of this stitch. You can use any yarn though, from something very fine to a chunky one. About a year ago I hooked up a shawl in a very floofy, thick-thin merino I found in a bargain bin (but why?!). The end result is quite different, but it’s also very pleasing to touch and wear.

The only thing to bear in mind is that this stitch has a lot of give and will continue to stretch over time. For a shawl this will only add to the gorgeousness of the drape, but for a garment you might need go down half a hook size.
*If you search for "waffle stitch" on YouTube, something very different turns up. I'm using the term that I found in my stitch dictionary (200 Crochet Stitches by Sarah Hazell) but if you know this stitch by another name, please let me know in the comments!

Note: this tutorial uses UK crochet terms. For a conversion chart to US terms, see the Yarn & Craft Council.
Difficulty Level
Confident Beginner
Materials
fingering weight yarn (or yarn of your choosing)
3mm hook (or hook appropriate for your yarn)
2 removable stitch markers
Stitches + Abbreviations
Ch - chain
Ch-sp - chain space
DC - double crochet
FDC - foundation double crochet
PM - place marker
PUL - pull up a loop
YO - yarn over
Straight Waffle Stitch
The Waffle stitch is worked over an odd number of stitches. For this sample, we'll start with an FDC row of 25 stitches. If you prefer, you can also start with 26 chains, then DC 1 in each chain from the second chain onwards.

FDC 25 OR ch 26, then DC 1 in each ch from 2nd ch to end. Turn.
Next, we will work a set-up row. Every stitch, including the starting chain, counts. You might find it helpful to mark the 2nd starting chain of each row with a stitch marker.
Ch 2 (counts as 1 st, PM on 2nd ch if desired), then:
step 1: insert hook in first st and PUL.
step 2: insert hook in second st and PUL.
step 3: YO and draw through first 2 loops on hook only.
step 4: YO and draw through remaining 2 loops on hook.
step 5: ch 1.

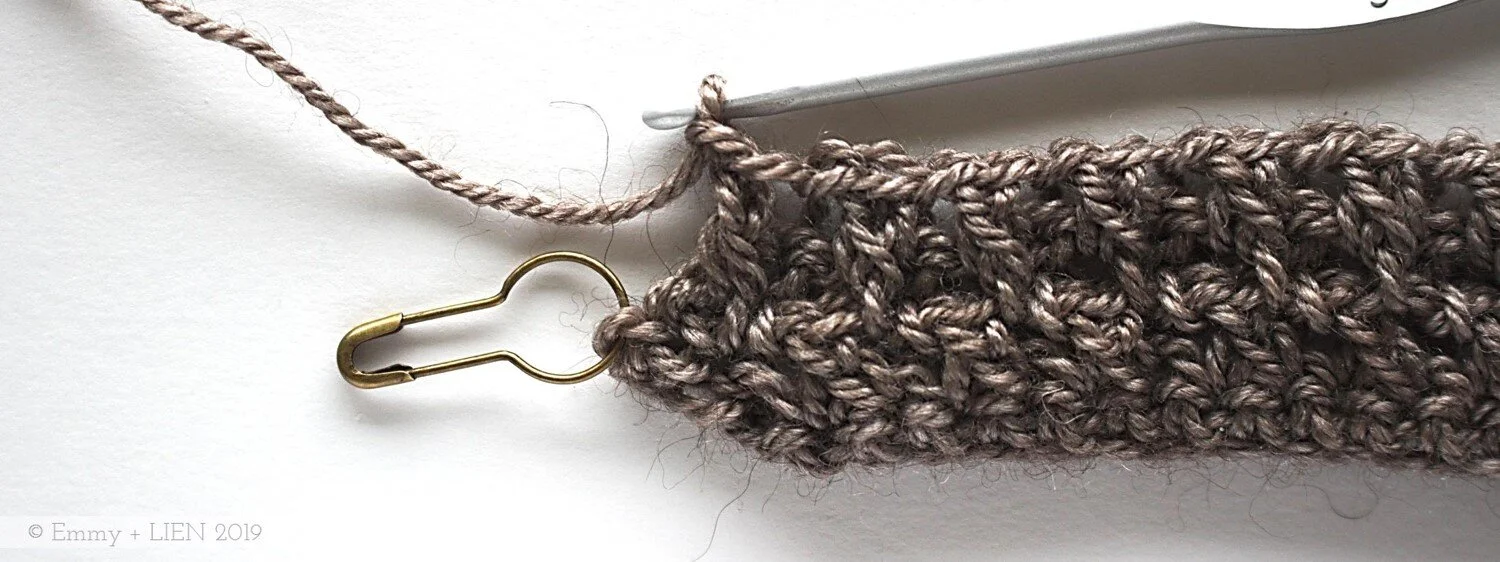
Ch 2 (counts as 1 st, PM on 2nd ch if desired), insert hook in first st and PUL, insert hook in second st and PUL

YO and draw through first 2 loops on hook only

YO and draw through remaining 2 loops on hook (then ch 1 - not pictured)

Each repeat of steps 1-4 make an ExtDC2-tog, or an “extended double crochet 2 together”. The ch 1 between each ExtDC2-tog keeps the stitch count on track.
Keep repeating steps 1-5 until 1 st remains, then DC 1 in the last st. Turn.
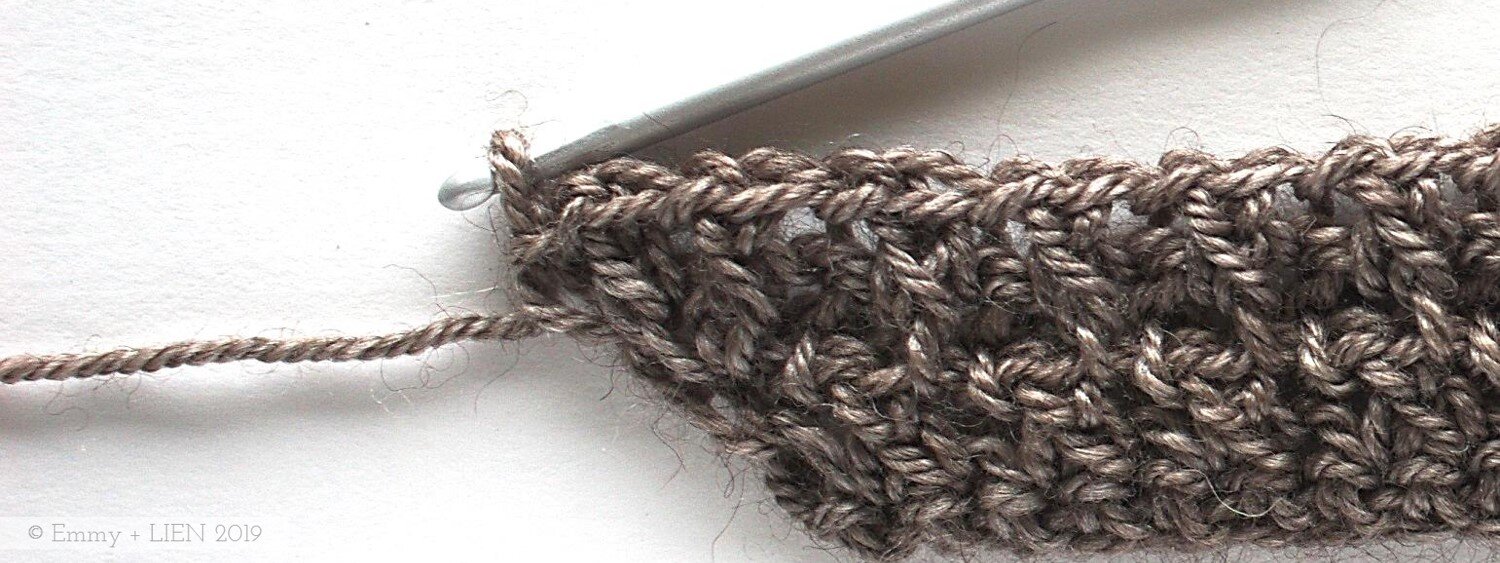
![Work [ExtDC2-tog, ch 1] until 1 FDC remains](https://images.squarespace-cdn.com/content/v1/56b0b1c737013ba7c302f42c/1575966290638-RVH6O8NXF3WMBMWQ6UIB/image-asset.jpeg)
Work [ExtDC2-tog, ch 1] until 1 FDC remains

DC 1 in last FDC
For the rest of the sampler square we'll be working ordinary Waffle stitch rows. The first and last stitches of each row are always slightly different, but otherwise it's just the same stitch over and over.
Ch 2 (counts as 1 st, PM on 2nd ch if desired), then:
step 6: insert hook between the "V" of DC of prev row and PUL.
step 7: insert hook to left of DC of previous row (i.e. into ch-sp) and PUL.
step 8-10: as steps 3-5 above.

Insert hook in the “V” of DC of prev row and PUL

Insert hook to left of DC of prev row and PUL, YO and draw through first 2 loops on hook, YO and draw through remaining 2 loops on hook, ch 1
To continue:
step 11: insert hook to right of vertical thread of prev row and PUL.
step 12: insert hook to left of vertical thread of prev row (i.e. into ch-sp) and PUL.
step 13-15: as steps 3-5 above.

Insert hook to right of vertical thread of prev row and PUL

Insert hook to left of vertical thread of prev row and PUL

YO and draw through first 2 loops on hook, YO and draw through remaining 2 loops on hook, ch 1
Repeat steps 11-15 until 2 sts remain (i.e. one ExtDC2-tog and the starting ch). Skip the last ExtDC2-tog, remove the stitch marker, DC 1 in 2nd turning ch. Turn.


Skip the last ExtDC2-tog, remove stitch marker, DC 1 in 2nd turning ch
Continue working this last row until your piece has the required dimensions.
Increasing Waffle Stitch
In the Harvested Shawl pattern, the Waffle stitch increases by 4 stitches per row. This is achieved by working an extra DC and ch 1 at the beginning of the row, and working an extra ExtDC2-tog and ch 1 before the DC at the end of the row. Again, you might find it helpful to mark the second starting chain of each row.
Work both the foundation row and set-up row as for straight Waffle st. Turn.
Ch 2 (counts as 1 st, PM on 2nd ch if desired), then:
step 1: DC 1 between the "V" of DC of previous row, ch 1.
step 2: insert hook between the "V" of DC of previous row again and PUL.
step 3: insert hook to left of DC of previous row (i.e. into ch-sp) and PUL.
step 4: YO and draw through first 2 loops on hook only.
step 5: YO and draw through remaining 2 loops on hook.
step 6: ch 1.

DC 1 in “V” of prev row (then ch 1 - not pictured)

Insert hook between the "V" of DC of previous row again and PUL, then insert hook to left of DC of prev row and PUL

YO and draw through first 2 loops on hook, YO and draw through remaining 2 loops on hook, ch 1
Work ordinary Waffle st until only 1 st remains (i.e. the starting ch). Remove stitch marker, DC 1 in 2nd turning ch. Turn.

Work to end, DC 1 in turning ch
At the start of the next row, ch 2 (counts as 1 st, PM on 2nd ch if desired), work as prev row until 2 sts remain (i.e. DC and starting ch), then:
step 1: insert hook between the "V" of DC of prev row and PUL.
step 2: insert hook to left of DC of prev row (i.e. between DC and starting chains) and PUL.
step 3-5: as steps 4-6 above.
step 6: remove stitch marker, DC 1 in 2nd turning ch. Turn.

Insert hook between the "V" of DC of prev row and PUL, insert hook to left of DC of prev row (i.e. between DC and starting chains) and PUL,

YO and draw through first 2 loops on hook, YO and draw through remaining 2 loops on hook, ch 1
Remove stitch marker, DC 1 in 2nd turning ch
Disclosure: I was gifted three skeins of Beyul Fingering for the purpose of designing the Harvested Shawl.
This post does not contain affiliate links.

An Autumn {love} Story
Usually Autumn is brief here, but this year has been strangely warm, and so at the beginning of November, when I would expect there not to be a single leaf left anywhere, I found myself with the chance to photograph a new design outside.

The coming of Autumn always causes a feeling of melancholy in me, so profound I can almost taste it. It’s a kind of delicious flavour. There is something indulgent about savouring memories of long, warm summer days, feasting on the last bursts of colour, and not being able to help but feel a bit sad when the last of nature's bounty has gone. It is, after all, just so more-ish.
My recipe for for dealing with the sadness is warmth. Steaming soups, sourdough toast, melted butter for our bellies. Wool, wool and more wool over our shoulders, hands, heads. I unwrap all our jumpers with a sense of importance, and the kids just think it's funny to try on all of last year's hats at once.
Usually Autumn is brief here; King Winter comes swiftly and mercilessly, stifling everything for almost 6 months. But this year has been strangely warm, and so at the beginning of November, when I would not expect there to be a single leaf left anywhere, I found myself with the chance to photograph a new design outside.

Not inside, struggling with the lack of natural light and wracking my brains for appealing props, but out in the soft glow of the Autumn sun and marvelling at how much there still remained to enjoy.
Well, photograph the new design was the intention. I got distracted by the model.

With two small children and two jobs, life is full. Very often good-full but also challenging-full, and in either case there is very little time or space for us to just be. Ourselves, a couple.
Even this session was typically rushed; We wolfed down our lunch at a local cafe, spent just half an hour messing about with light and leaves and sleeves. Then it was straight back to work before the evening shift of dinner-bath-bed-COLLAPSE.
It was a nice half an hour though. Full of soft light. Of observing and connecting, however briefly. Of remembering a Before, with melancholy. For just a short while, all the drudgery, loneliness and friction that inevitably make up the darker side of an intense relationship sort of faded into the background.
I can't believe it's been 10 years since he wandered into my office 5 times a day, under the pretense of needing to use the photocopier. He's a good 'un, my husband (and he's hot, in my unbiased opinion). Although he wouldn't give me back my cardigan.


Seaglass Shawl: Choosing colours
With a week to go until the start of the #seaglassCAL , it’s time to talk colours. What will you choose?

Thank you so much to everyone who entered the Seaglass Shawl giveaway last week! I wish I could have given you all a kit (including myself), but alas! There could only be one winner. So congratulations Kat! Your prize will be with you soon.
Last week I set up the Seaglass Shawl CAL page on Facebook too. I honestly thought I'd be wafting around on my own in there like a lonely tumbleweed, but we have almost 30 members from across the globe already! If you'd like to join in, just click here. You can add friends to the group, too, and if you're not into facebook (or also into instagram!) you can use the hashtag #seaglassCAL on IG.
[Reminder: the Seaglass Shawl crochet pattern is available to buy on Ravelry]
As the CAL doesn't officially start until May 7th, there's still time to get your yarn choices sorted out. In case anyone is struggling with what colours to combine, I thought I'd explain how Petra and I put together the kits.
I feel I should come clean here - the kits are 99% Petra's work. She sent me tons of beautiful yarn pictures with only the vaguest of suggestions from me. There's a reason she is the professional dyer out of the two of us. It was so hard to finalise them into a list of only 5 (4 plus the original), but some general questions I used to guide my choices were:
- what will look good closest to the face?
- is there enough contrast to keep things interesting?
- do the stitches come out as I intended them to or is the detail lost?
Colour by colour, then, my thought process went like this:
Main Colour (MC) - the colour which gives the shawl its overall character, but which also needs to look good next to the face. Should not drown out the other colours, so keep it fairly light. Bonus points for speckles, which can then be picked up in the other colours.
Contrast Colour 1 (CC1) - the colour which ties the whole multi-stitch section together. Should therefore look good next to ALL of the other colours. Can be light to medium in intensity, so as to provide enough contrast but still show off the detail of the cross-over stitch.
Contrast Colour 2 (CC2) - complements CC1 but still provides some contrast.
Contrast Colour 3 (CC3) - the bold "statement" colour used for the clusters and border. Be brave and choose something that provides a strong contrast.
Here is what all of that actually looks like in practice.


Having said all of the above, I should add that colour choices are of course completely personal. One kit that didn't make it to the shop but which I LOVE is this one:

image credit: Fru Valborg
It's more of a fade rather than the light-dark, cold-warm contrasting palette of the others, and I therefore felt it didn't stay true enough to MY design. But does that mean it can't be YOUR shawl? Of course not. Part of the fun of putting a design out there is seeing how others interpret it, and as it happens I've seen a similar combination pop up on instagram already. I have no doubt it's going to be beautiful.